الدليل الكامل
استخدام برنامج
مزاد المسابيح
شرح عملي لدورة العمل كاملة: تسجيل المالك، استلام المسابيح، إعداد المزاد، البيع، التسليم، الإرجاع، تسوية المالك وأرشفة المستندات.
Complete user guide
Using
Masabeeh Auction
A practical walkthrough of the complete workflow: owner registration, item intake, auction setup, sale, delivery, returns, owner settlement and document archiving.
الأقسام الرئيسية
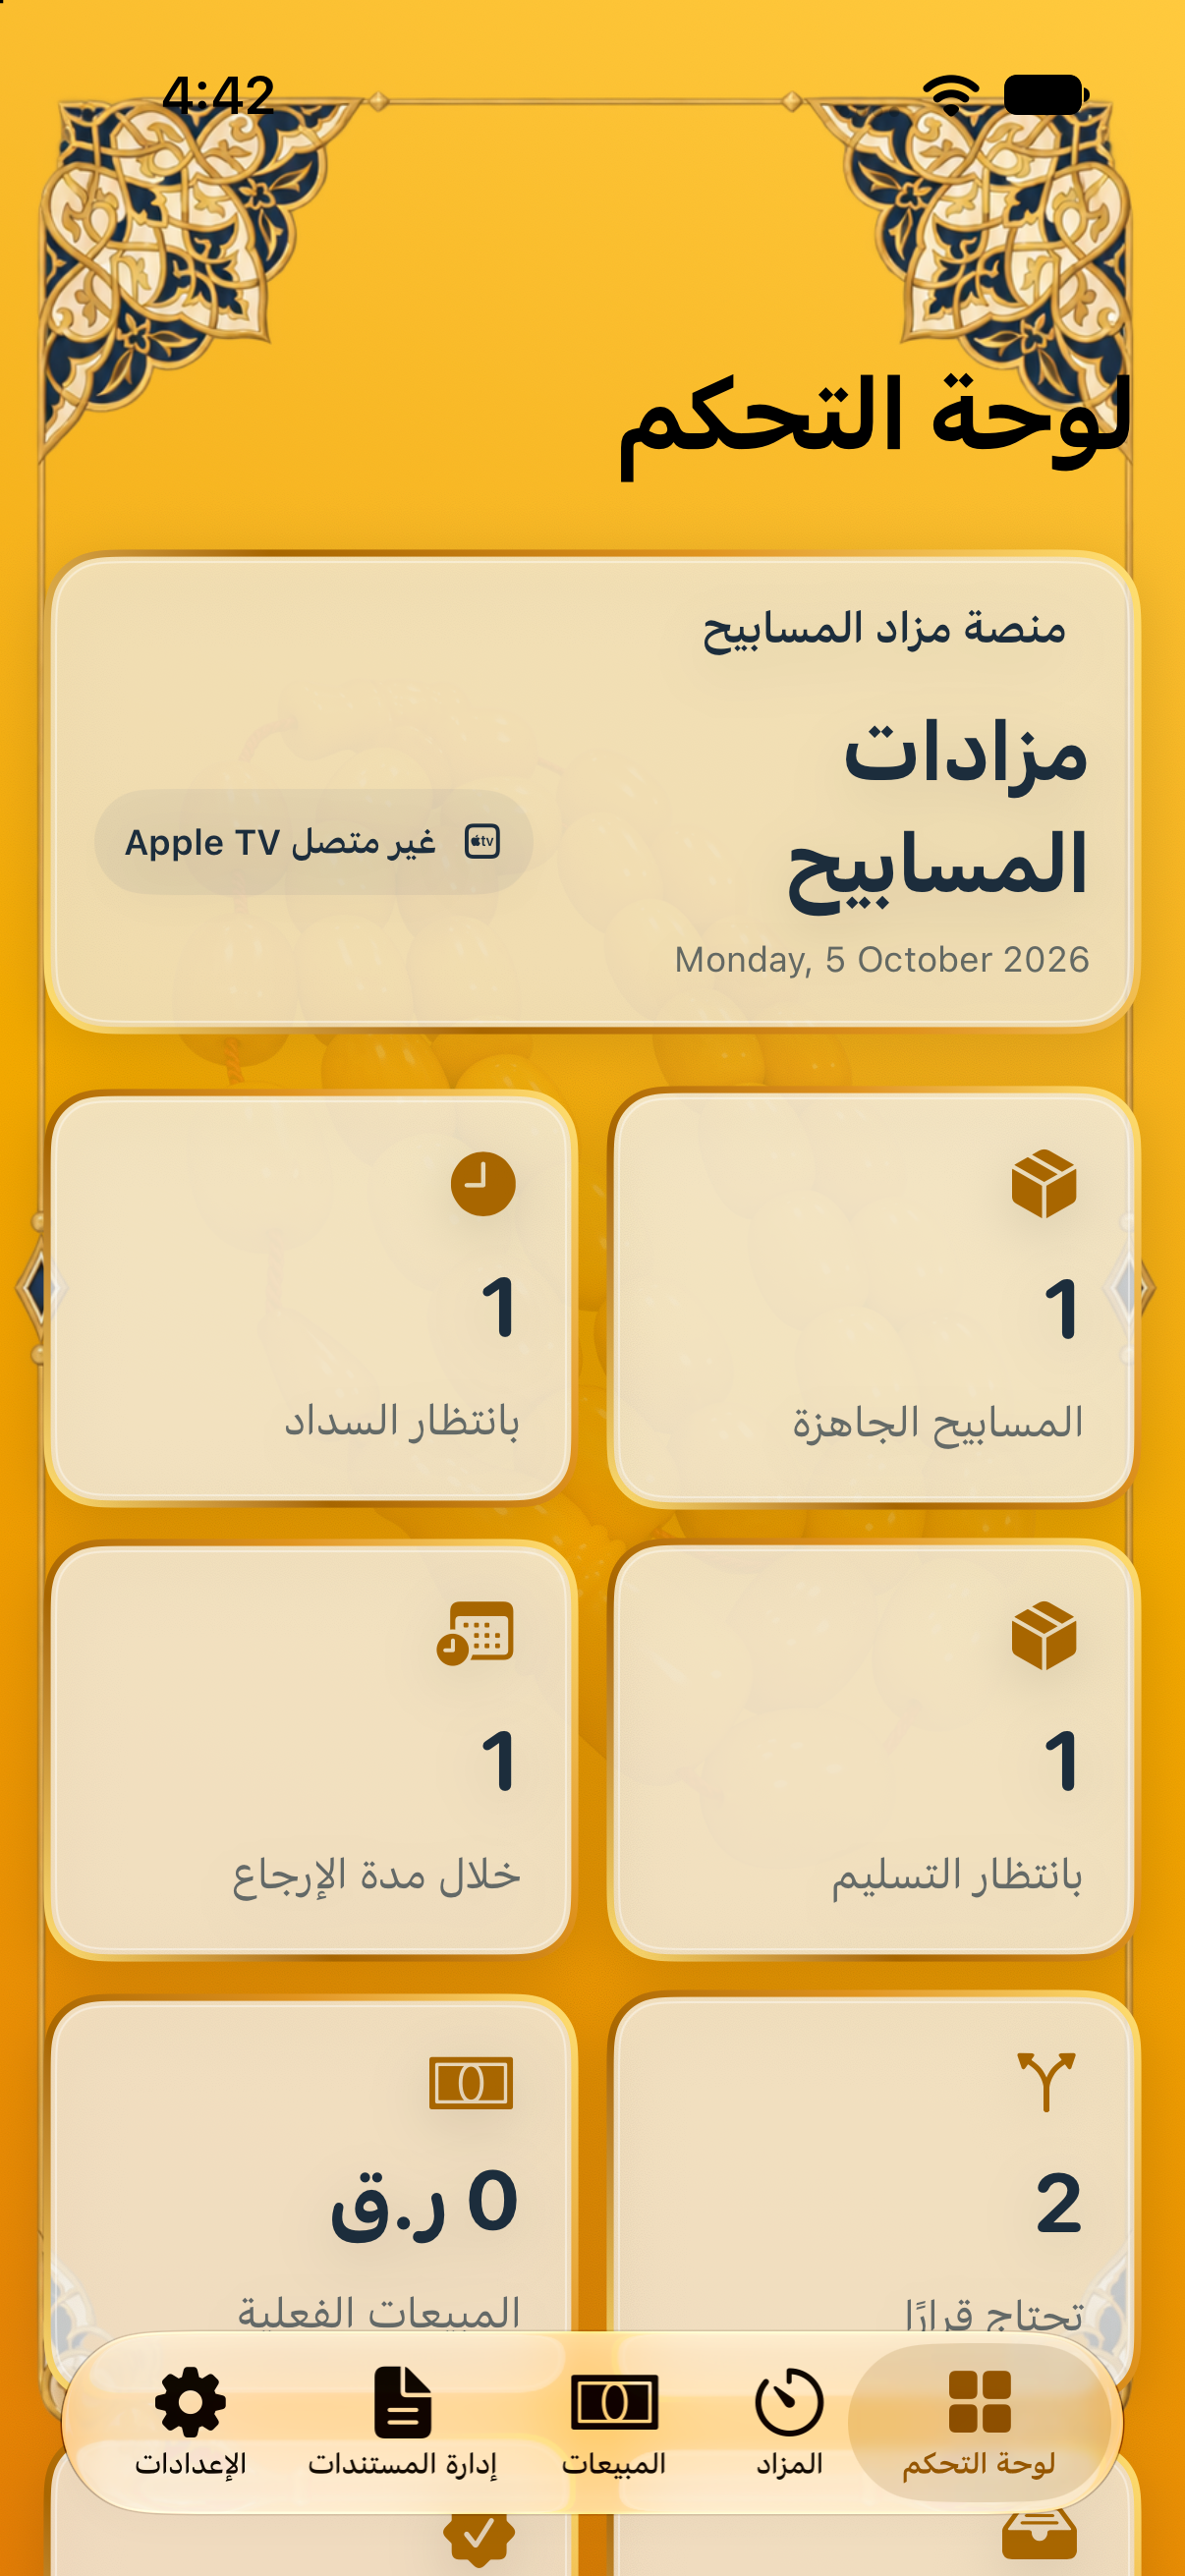
يتكون البرنامج من خمسة أقسام ثابتة في شريط التنقل: لوحة التحكم، المزاد، المبيعات، إدارة المستندات، والإعدادات. تعرض لوحة التحكم ملخص العمل والحالات التي تحتاج إلى إجراء.
- ابدأ من لوحة التحكم لمراجعة حالة العمل.
- استخدم المزاد لترتيب قائمة العرض وتشغيل الجلسة.
- تابع كل عملية بيع من قسم المبيعات حتى إغلاقها.
Main sections
The app has five permanent tabs: Dashboard, Auction, Sales, Document Management and Settings. The Dashboard summarizes activity and items requiring action.
- Start on the Dashboard to review operational status.
- Use Auction to arrange the queue and run the session.
- Track every transaction in Sales until it is closed.
تسجيل المالك واستلام المسابيح
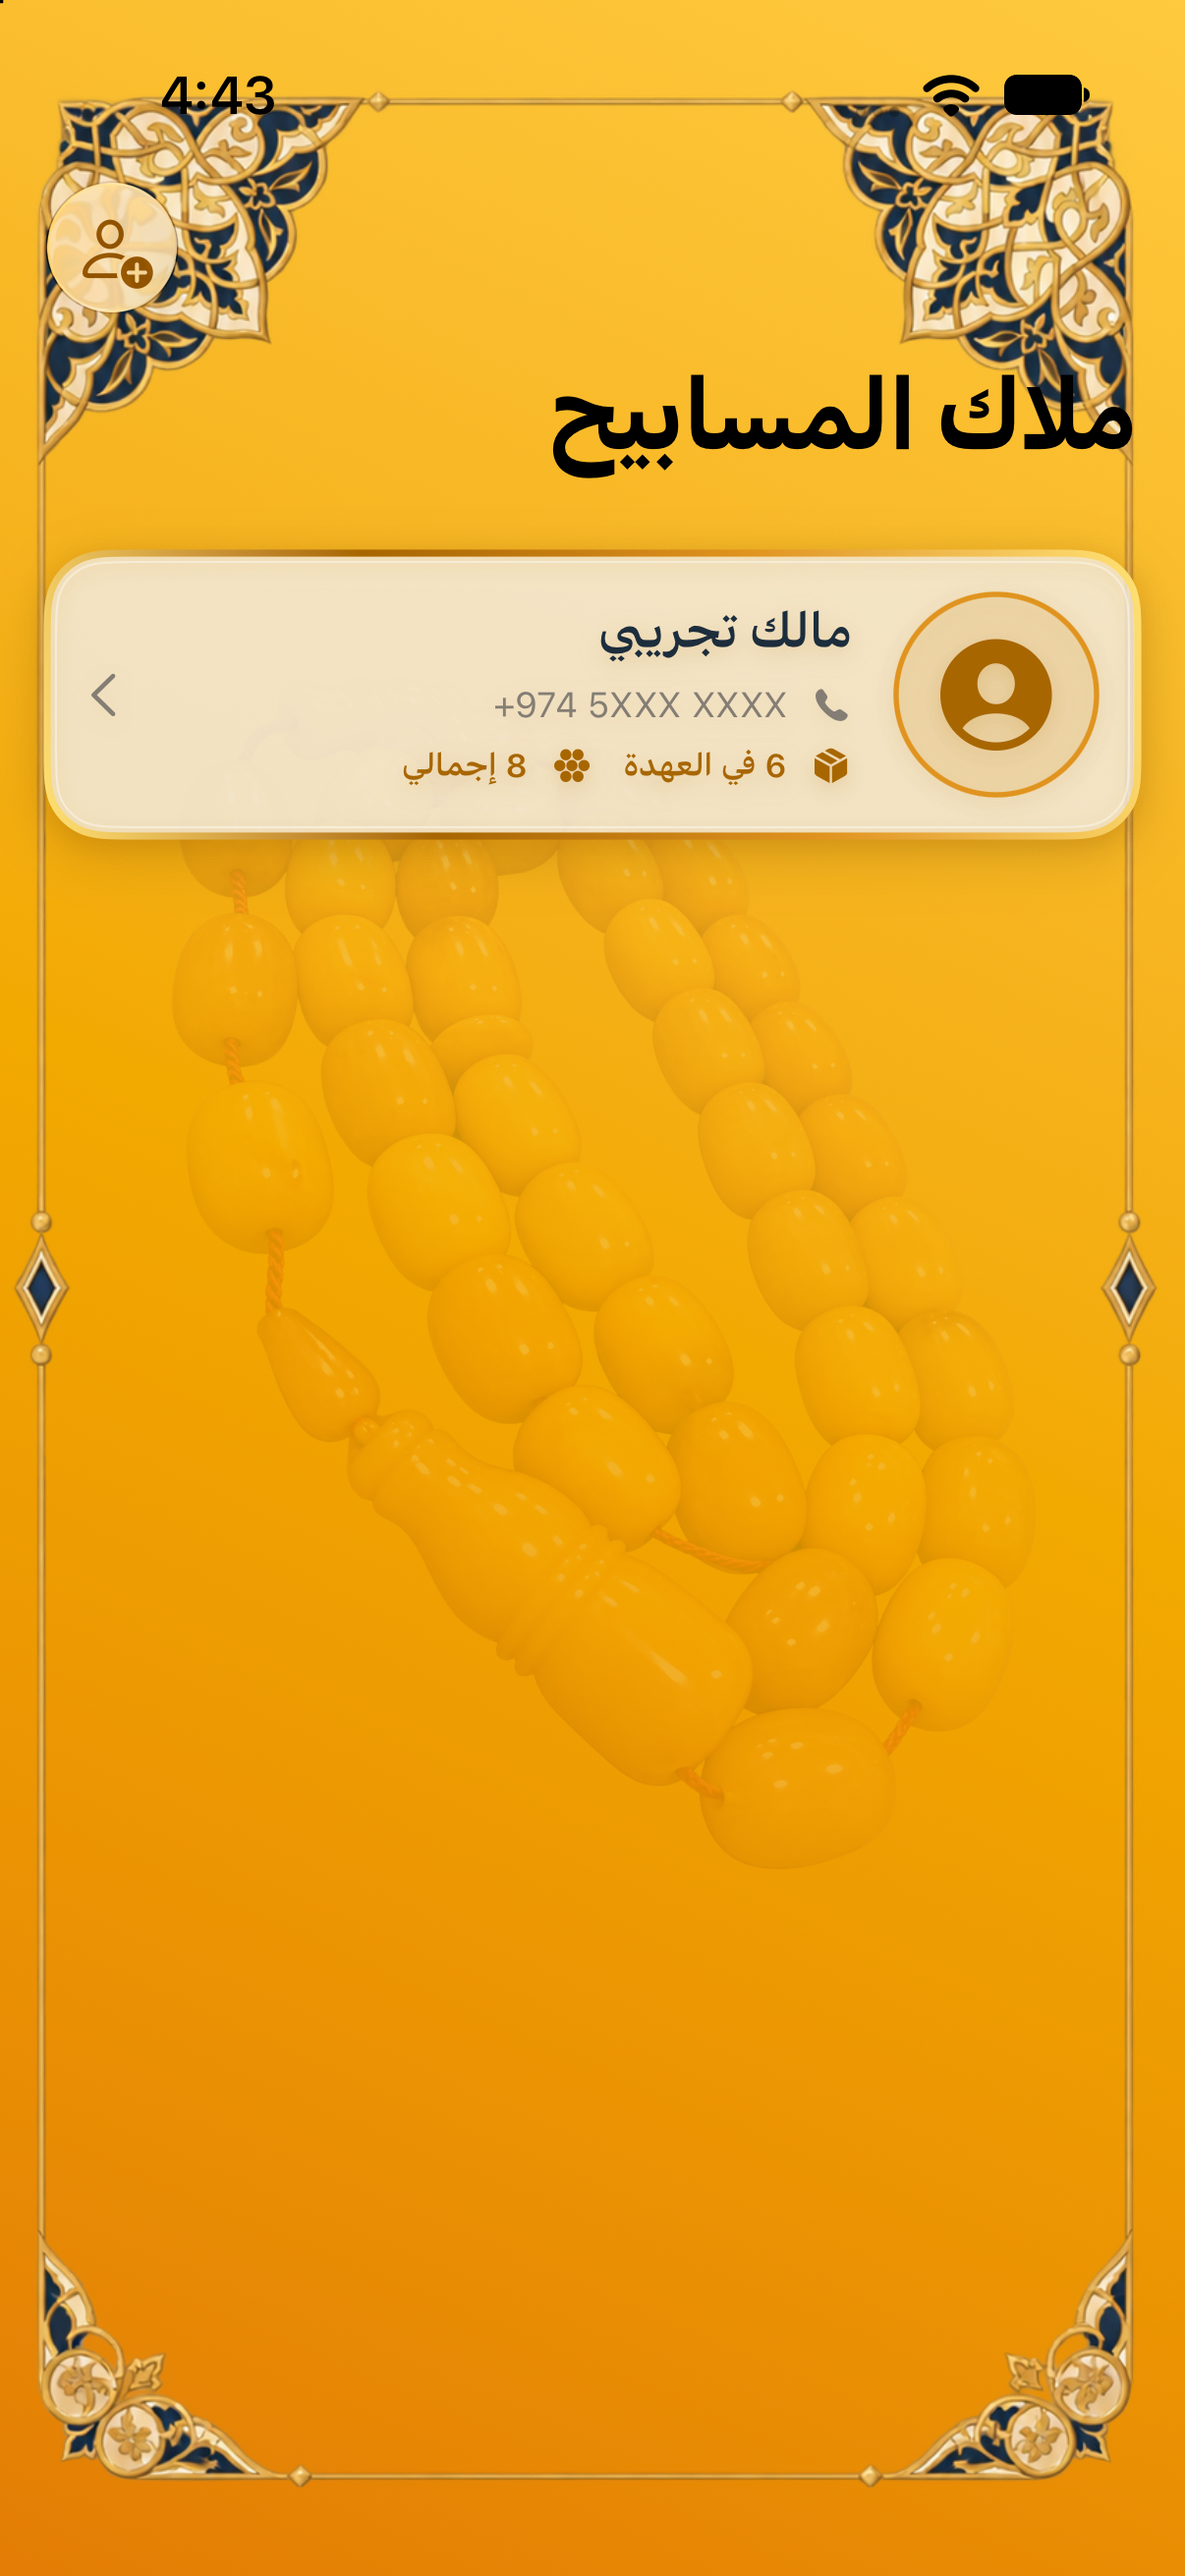
- افتح قسم المزاد، ثم اختر «الملاك واستلام المسابيح».
- أضف ملف المالك وأدخل بيانات الاتصال والهوية والعنوان.
- أضف الصورة الشخصية وصور الهوية عند الحاجة.
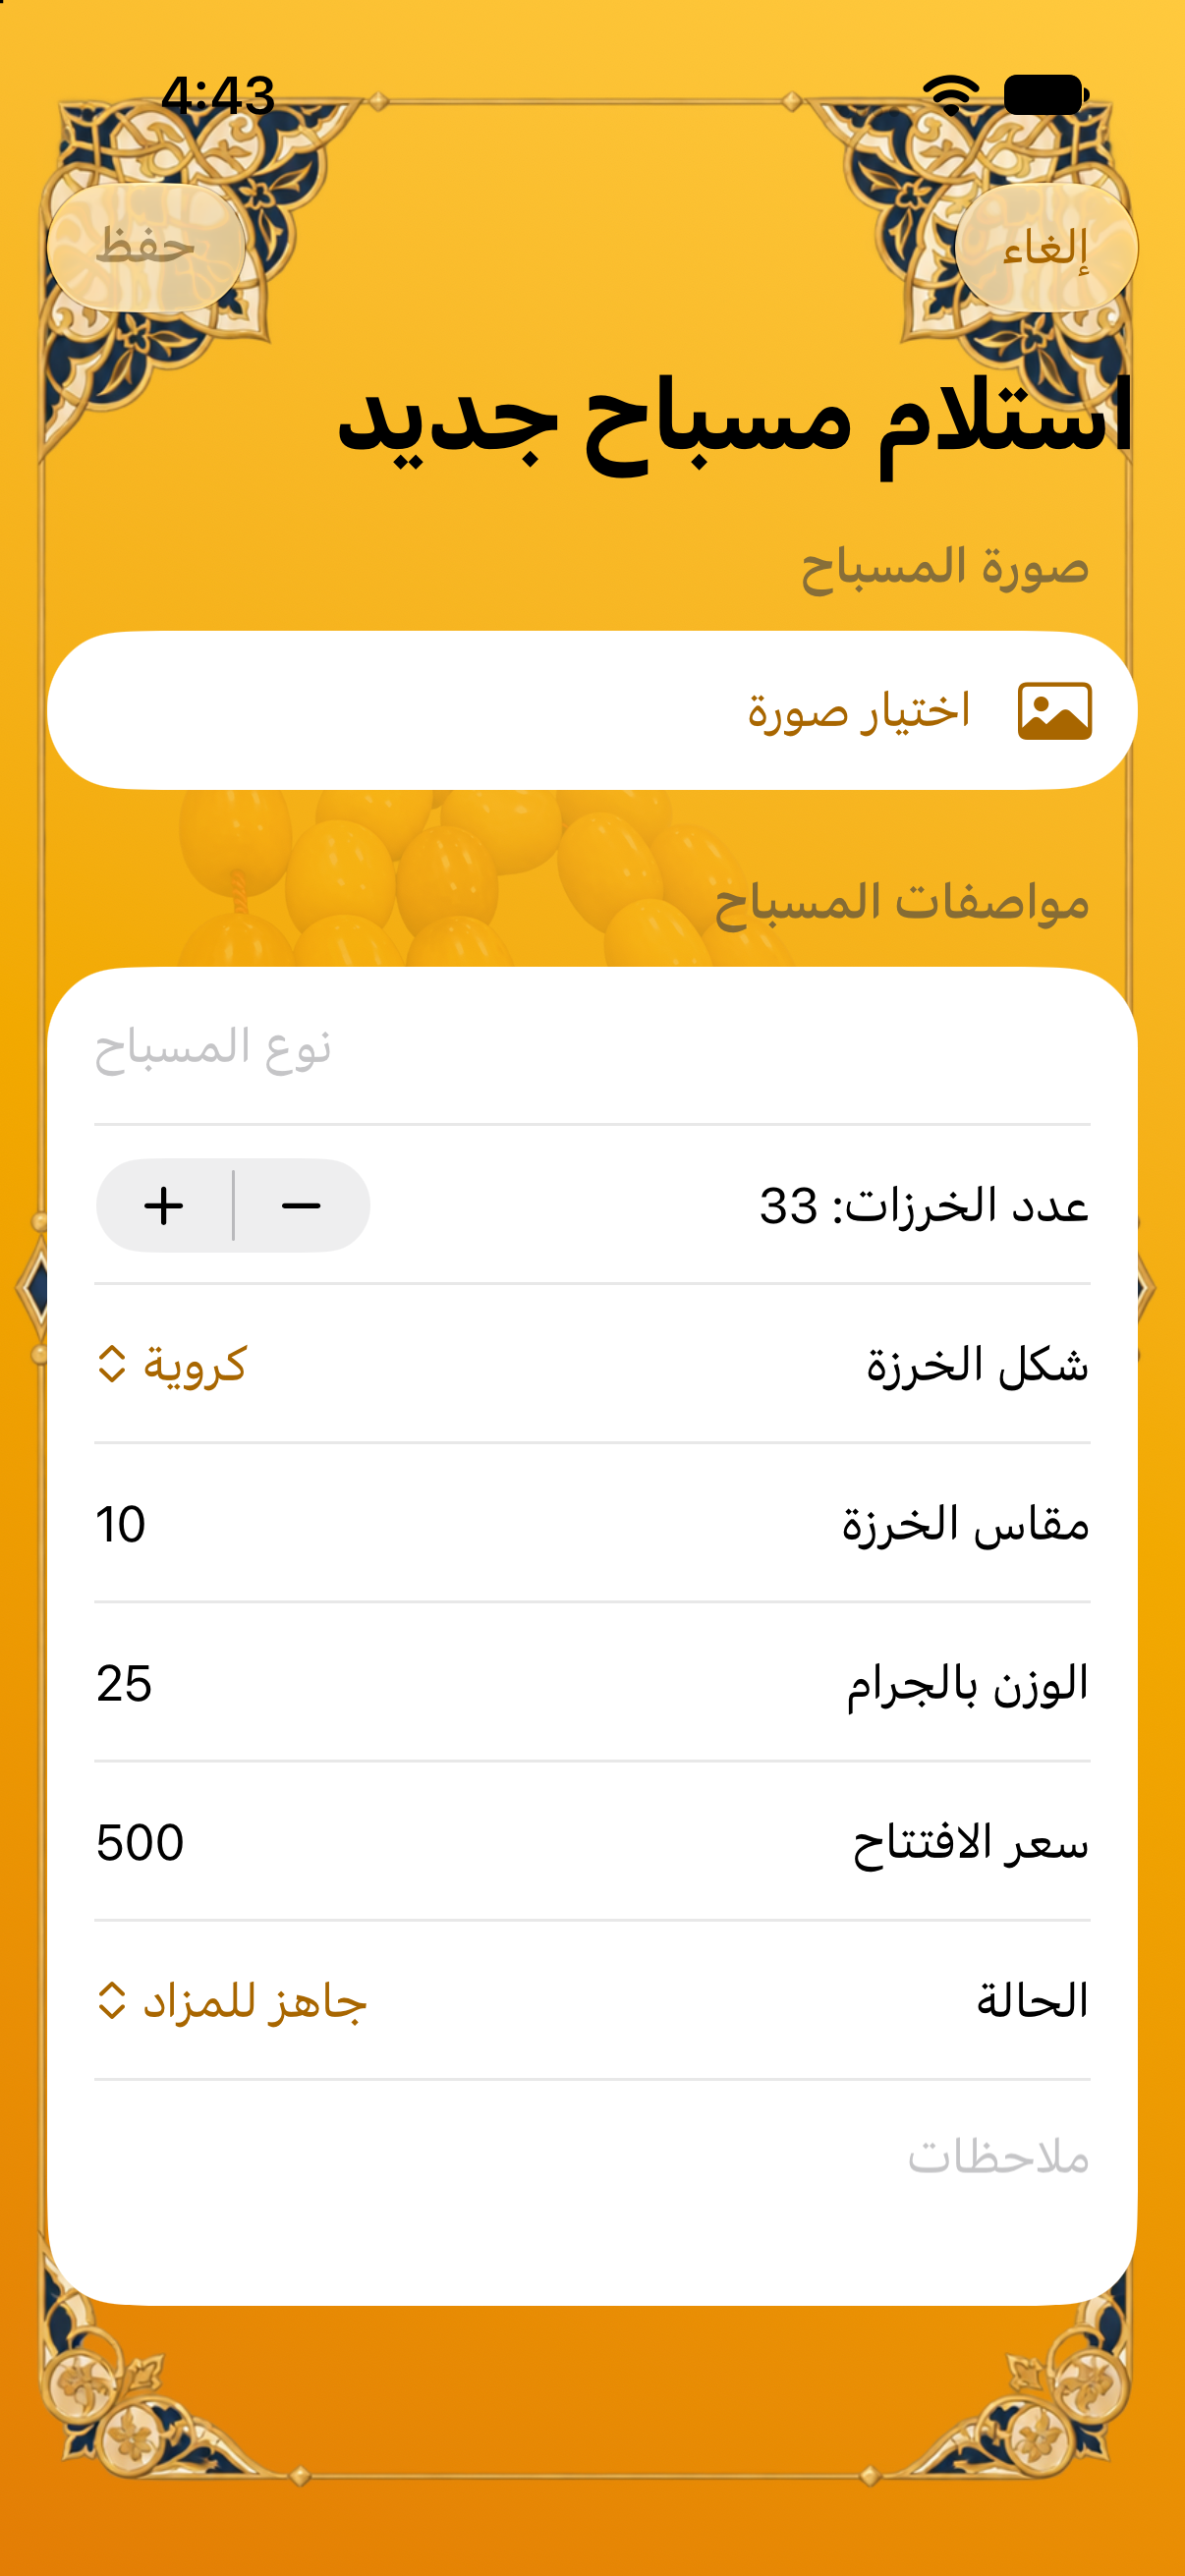
- اختر «استلام مسباح جديد من هذا المالك» وسجّل الصورة والمواصفات وسعر الافتتاح.
- يصدر سند استلام ويرتبط بالمسباح والمالك.
Register an owner and receive items
- Open Auction, then choose Owners & Item Intake.
- Create the owner profile with contact, identity and address details.
- Add the portrait and identity images when required.
- Select Receive a New Item and enter its image, specifications and opening price.
- An intake receipt is created and linked to the owner and item.
تجهيز المزاد وتشغيله
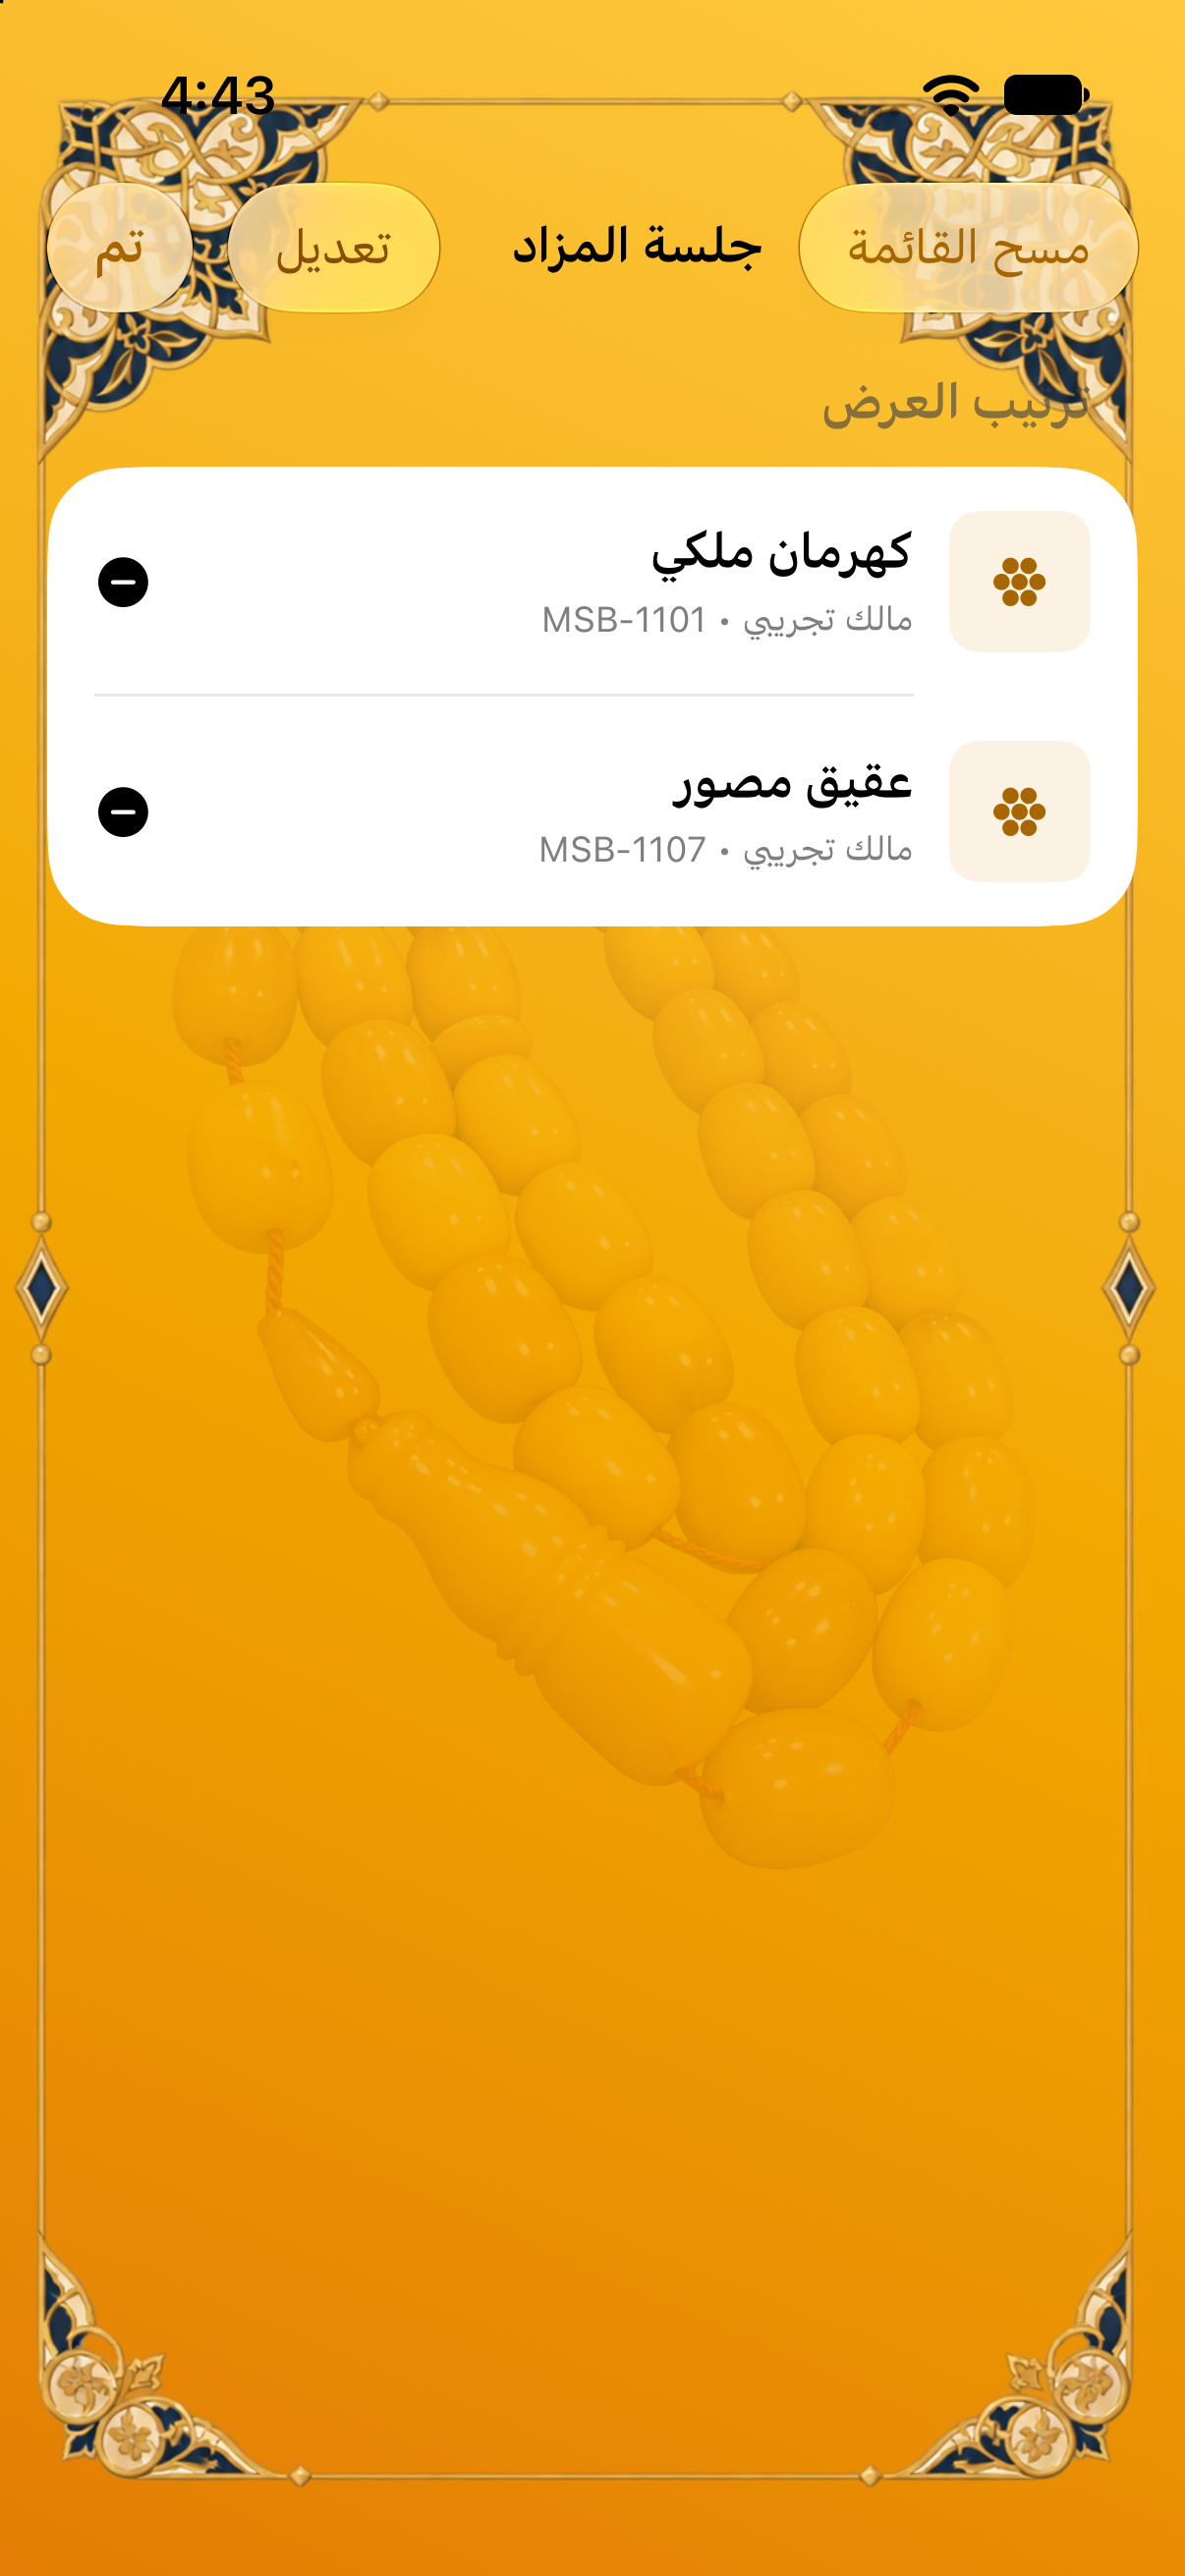
- افتح «إدارة قائمة العرض وترتيبها».
- أضف المسابيح الجاهزة ورتّبها بالسحب.
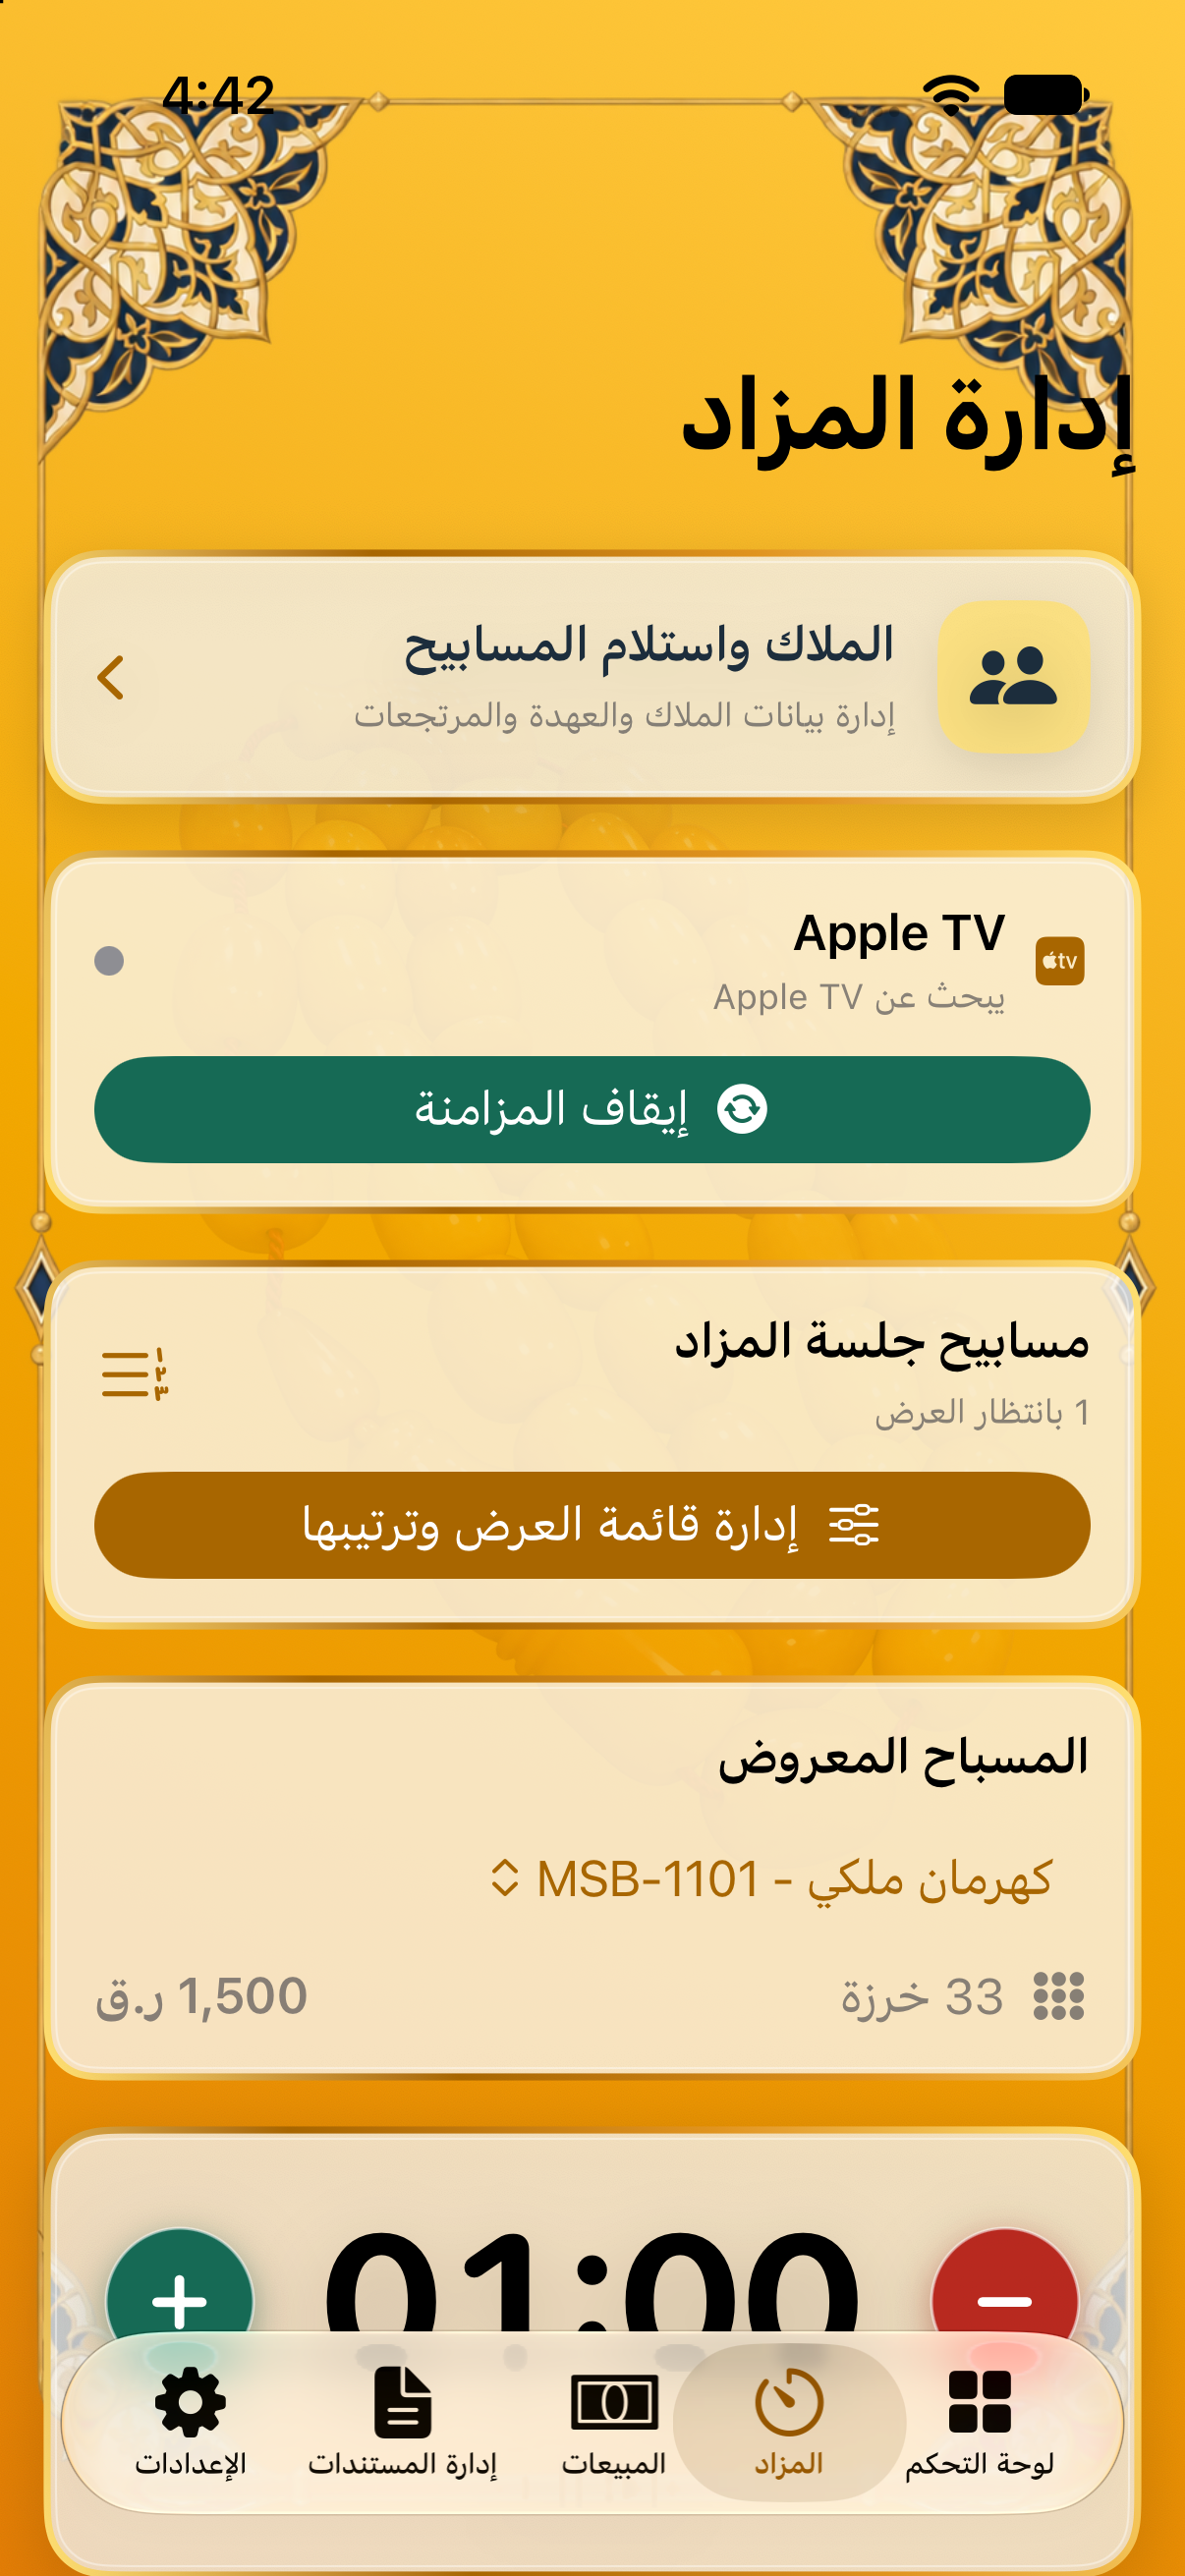
- اختر المسباح المعروض وحدد مدة المزاد.
- ابدأ المزاد، وأضف وقتًا سريعًا أو عدّل المؤقت عند الحاجة.
- عند انتهاء المؤقت اختر تأكيد البيع أو «لم يُبع».
Prepare and run the auction
- Open Manage and Arrange Auction Queue.
- Add ready items and drag them into the required order.
- Select the displayed item and set the auction duration.
- Start the auction and add quick time or adjust the timer when needed.
- When time ends, confirm the sale or mark the item as unsold.
تأكيد البيع وإصدار الفاتورة
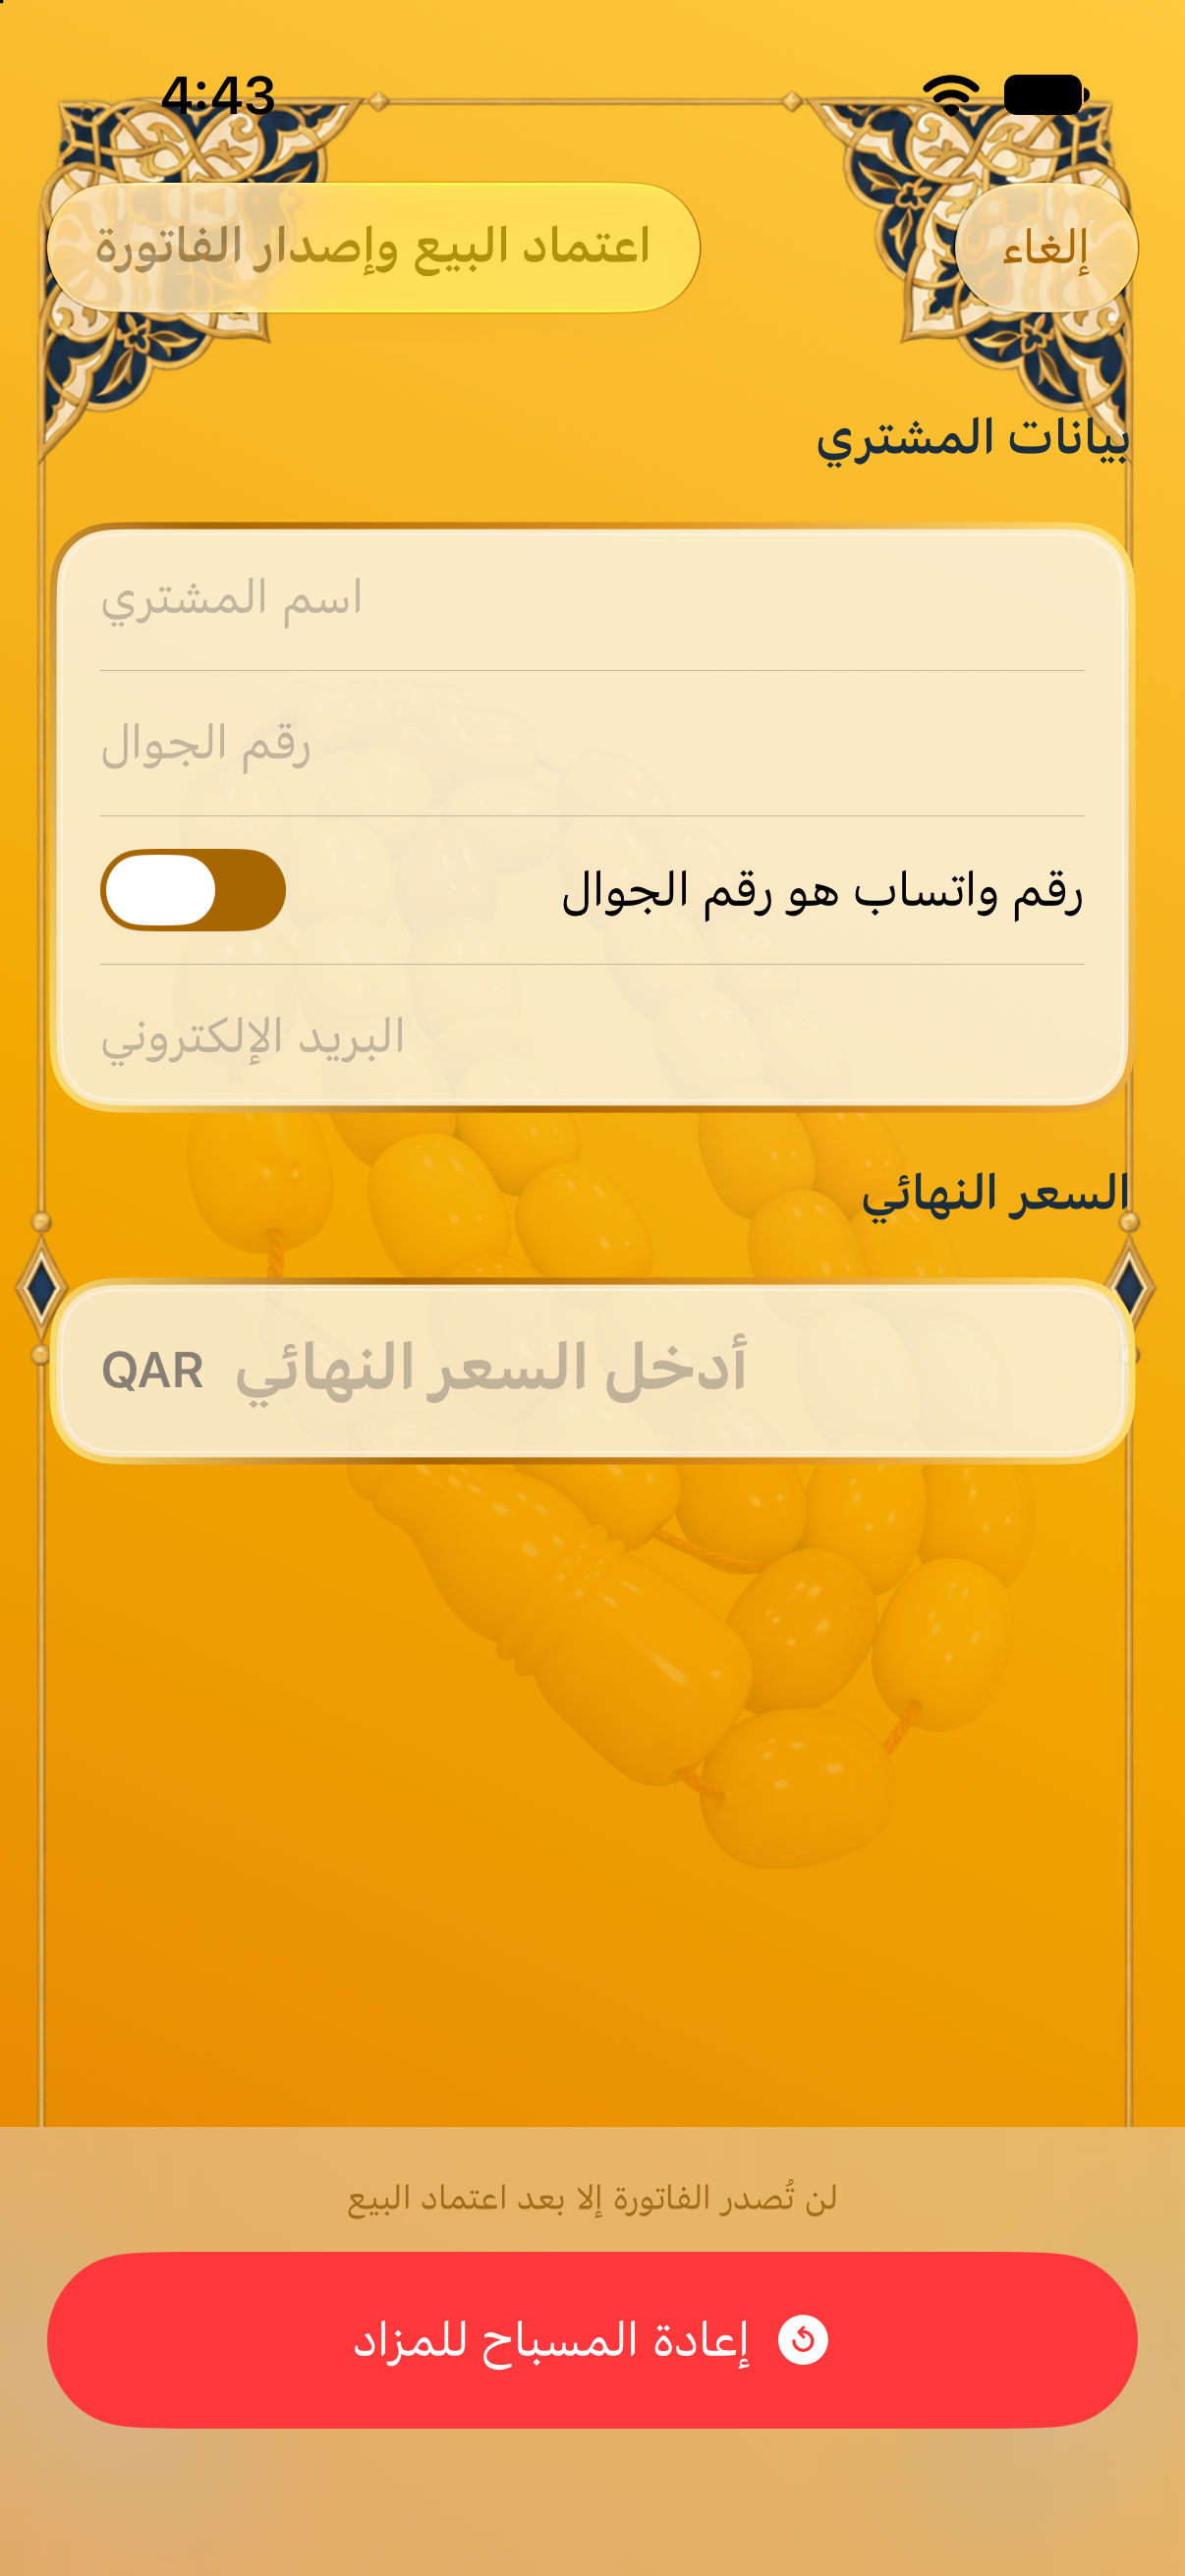
- أدخل اسم المشتري ورقم الجوال والبريد الإلكتروني.
- أدخل السعر النهائي؛ لا تصدر فاتورة قبل التأكيد الصحيح.
- راجع بيانات المسباح والمشتري ثم أكد البيع.
- تظهر العملية في «بانتظار السداد» وتُنشأ فاتورة مرتبطة بالمسباح.
إذا تراجع المشتري قبل اعتماد البيع، أعد المسباح مباشرة إلى قائمة القرار من شاشة المزاد.
Confirm the sale and issue an invoice
- Enter the buyer name, mobile number and email address.
- Enter the final price. No invoice is issued before a valid confirmation.
- Review the buyer and item details, then confirm the sale.
- The transaction appears under Awaiting Payment and an invoice is linked to the item.
If the buyer withdraws before confirmation, return the item directly to the auction decision queue.
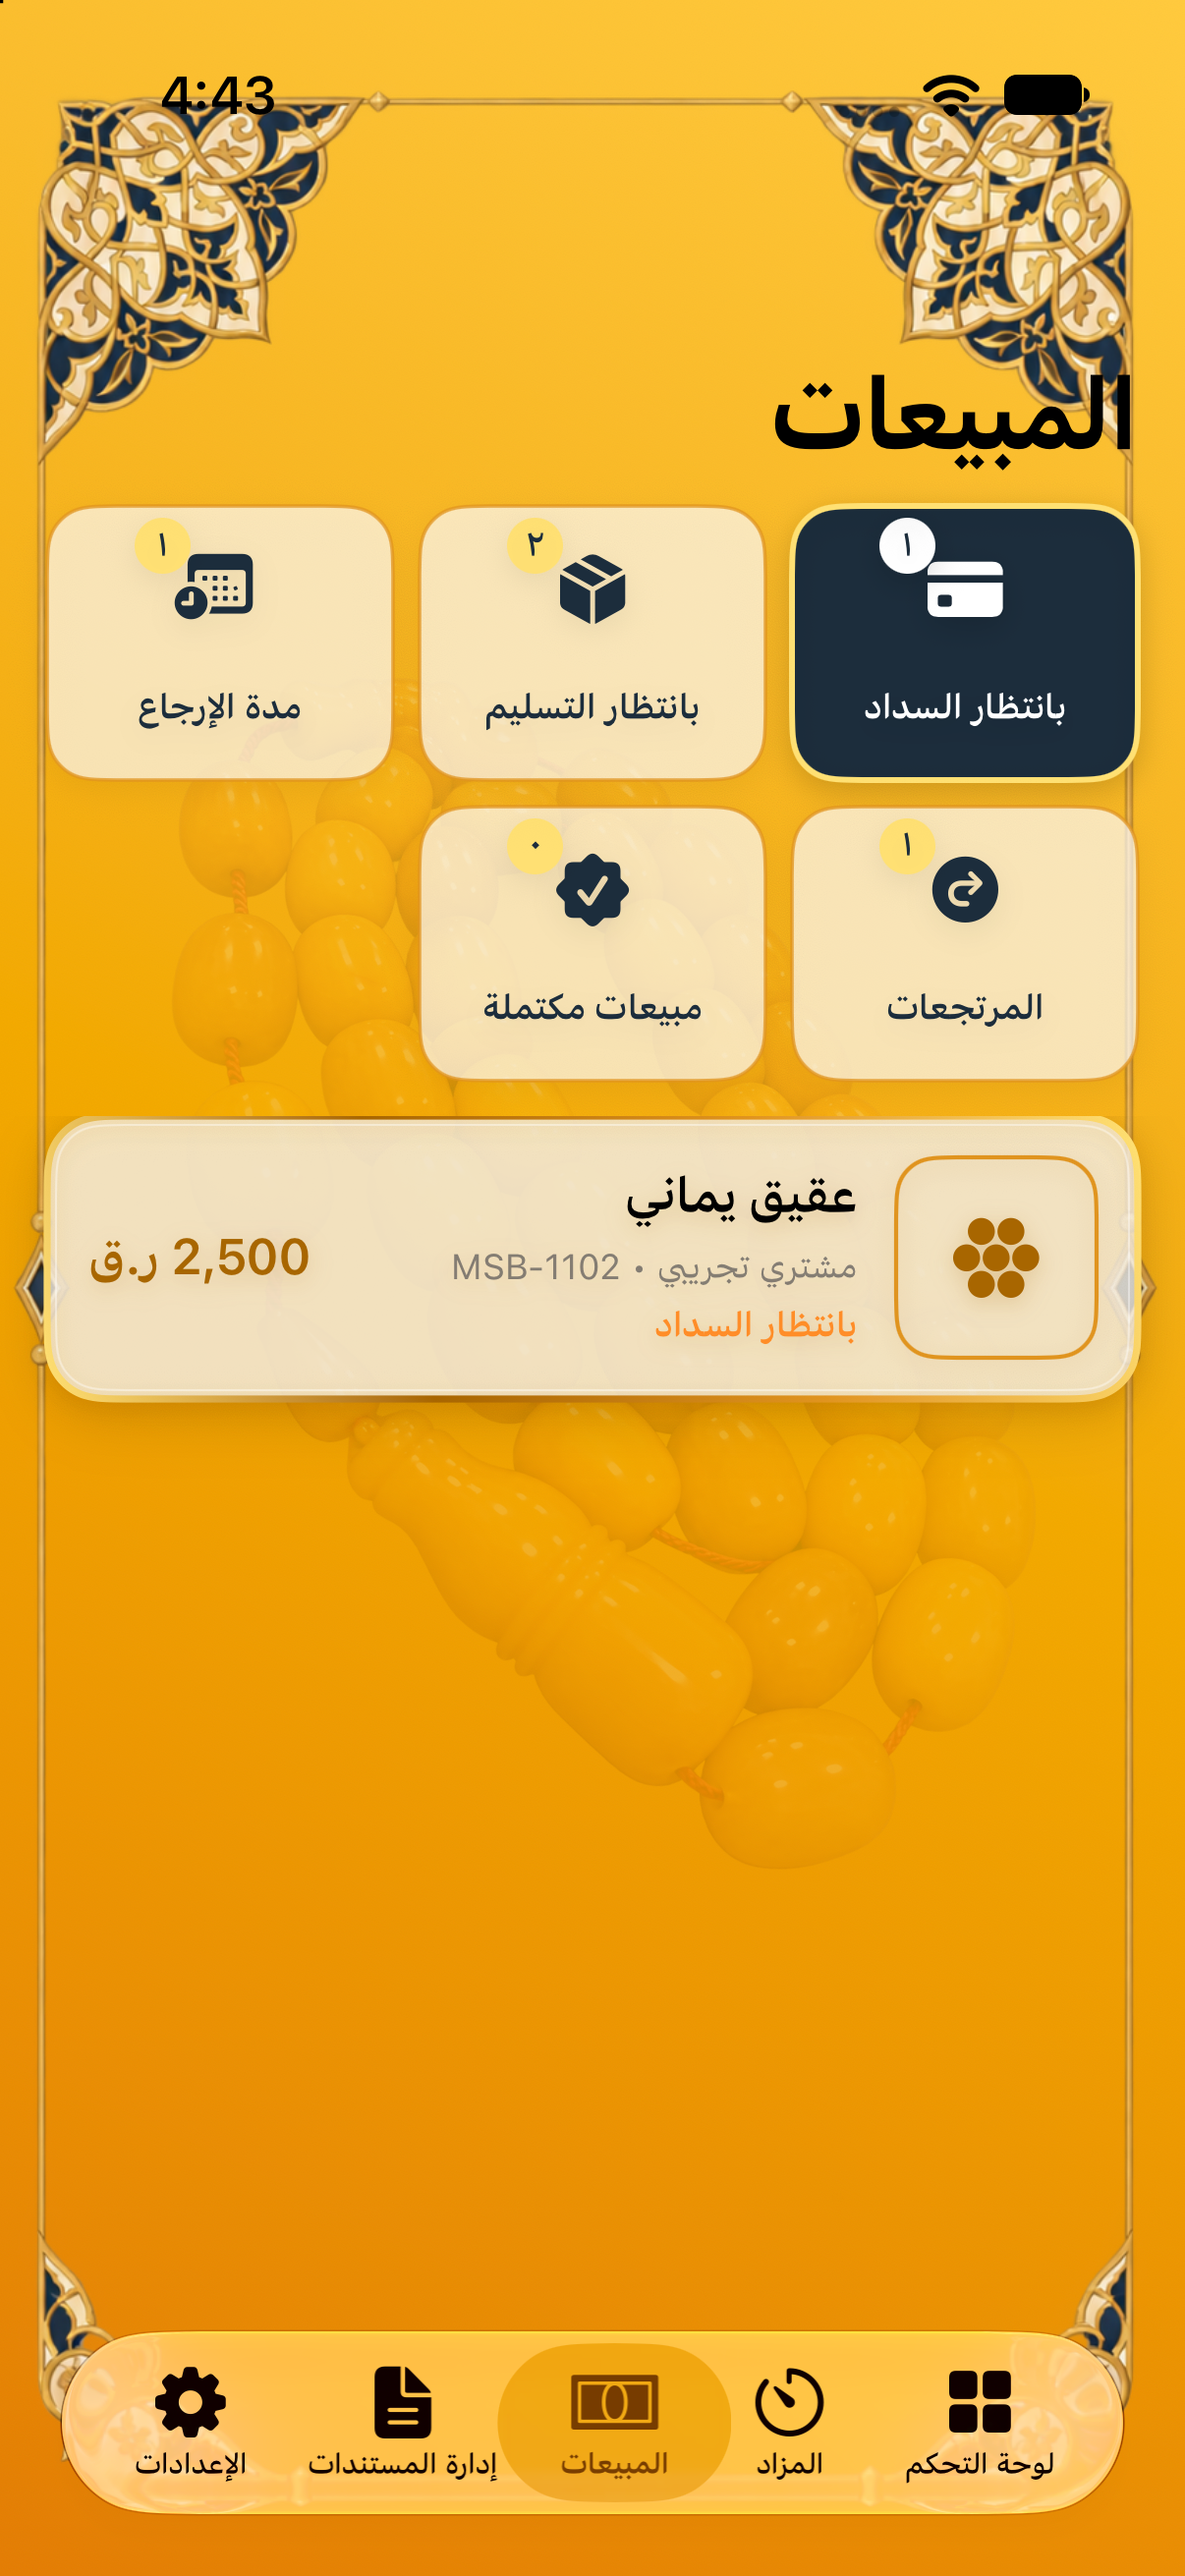
السداد والتسليم ومدة الإرجاع
- سجّل السداد لينتقل المسباح إلى «بانتظار التسليم».
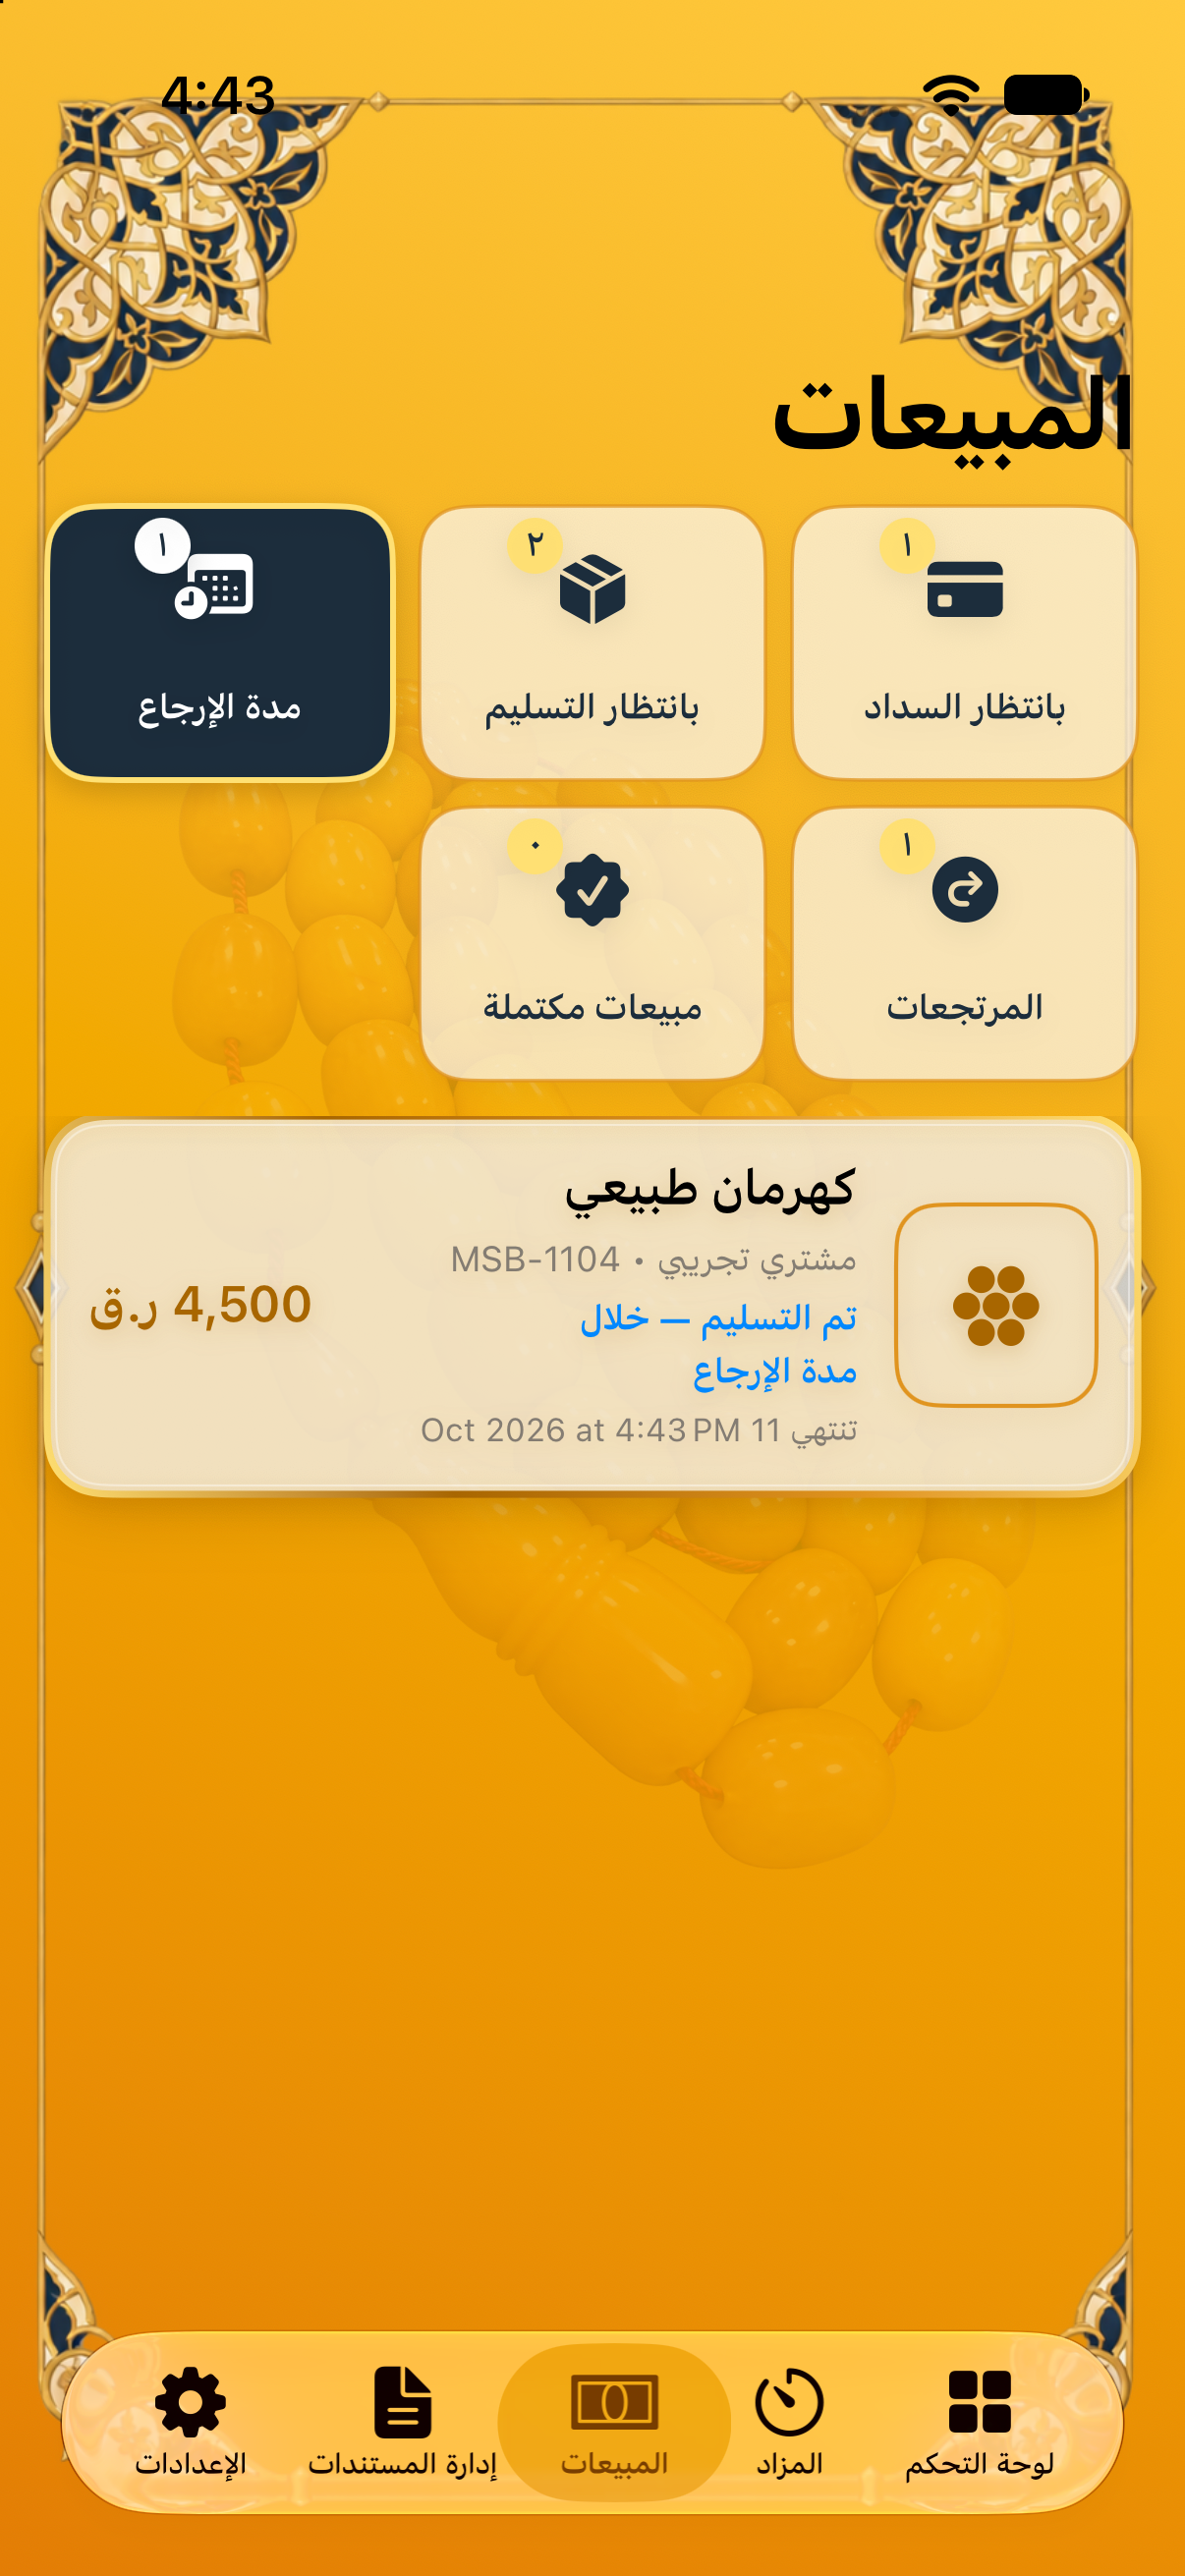
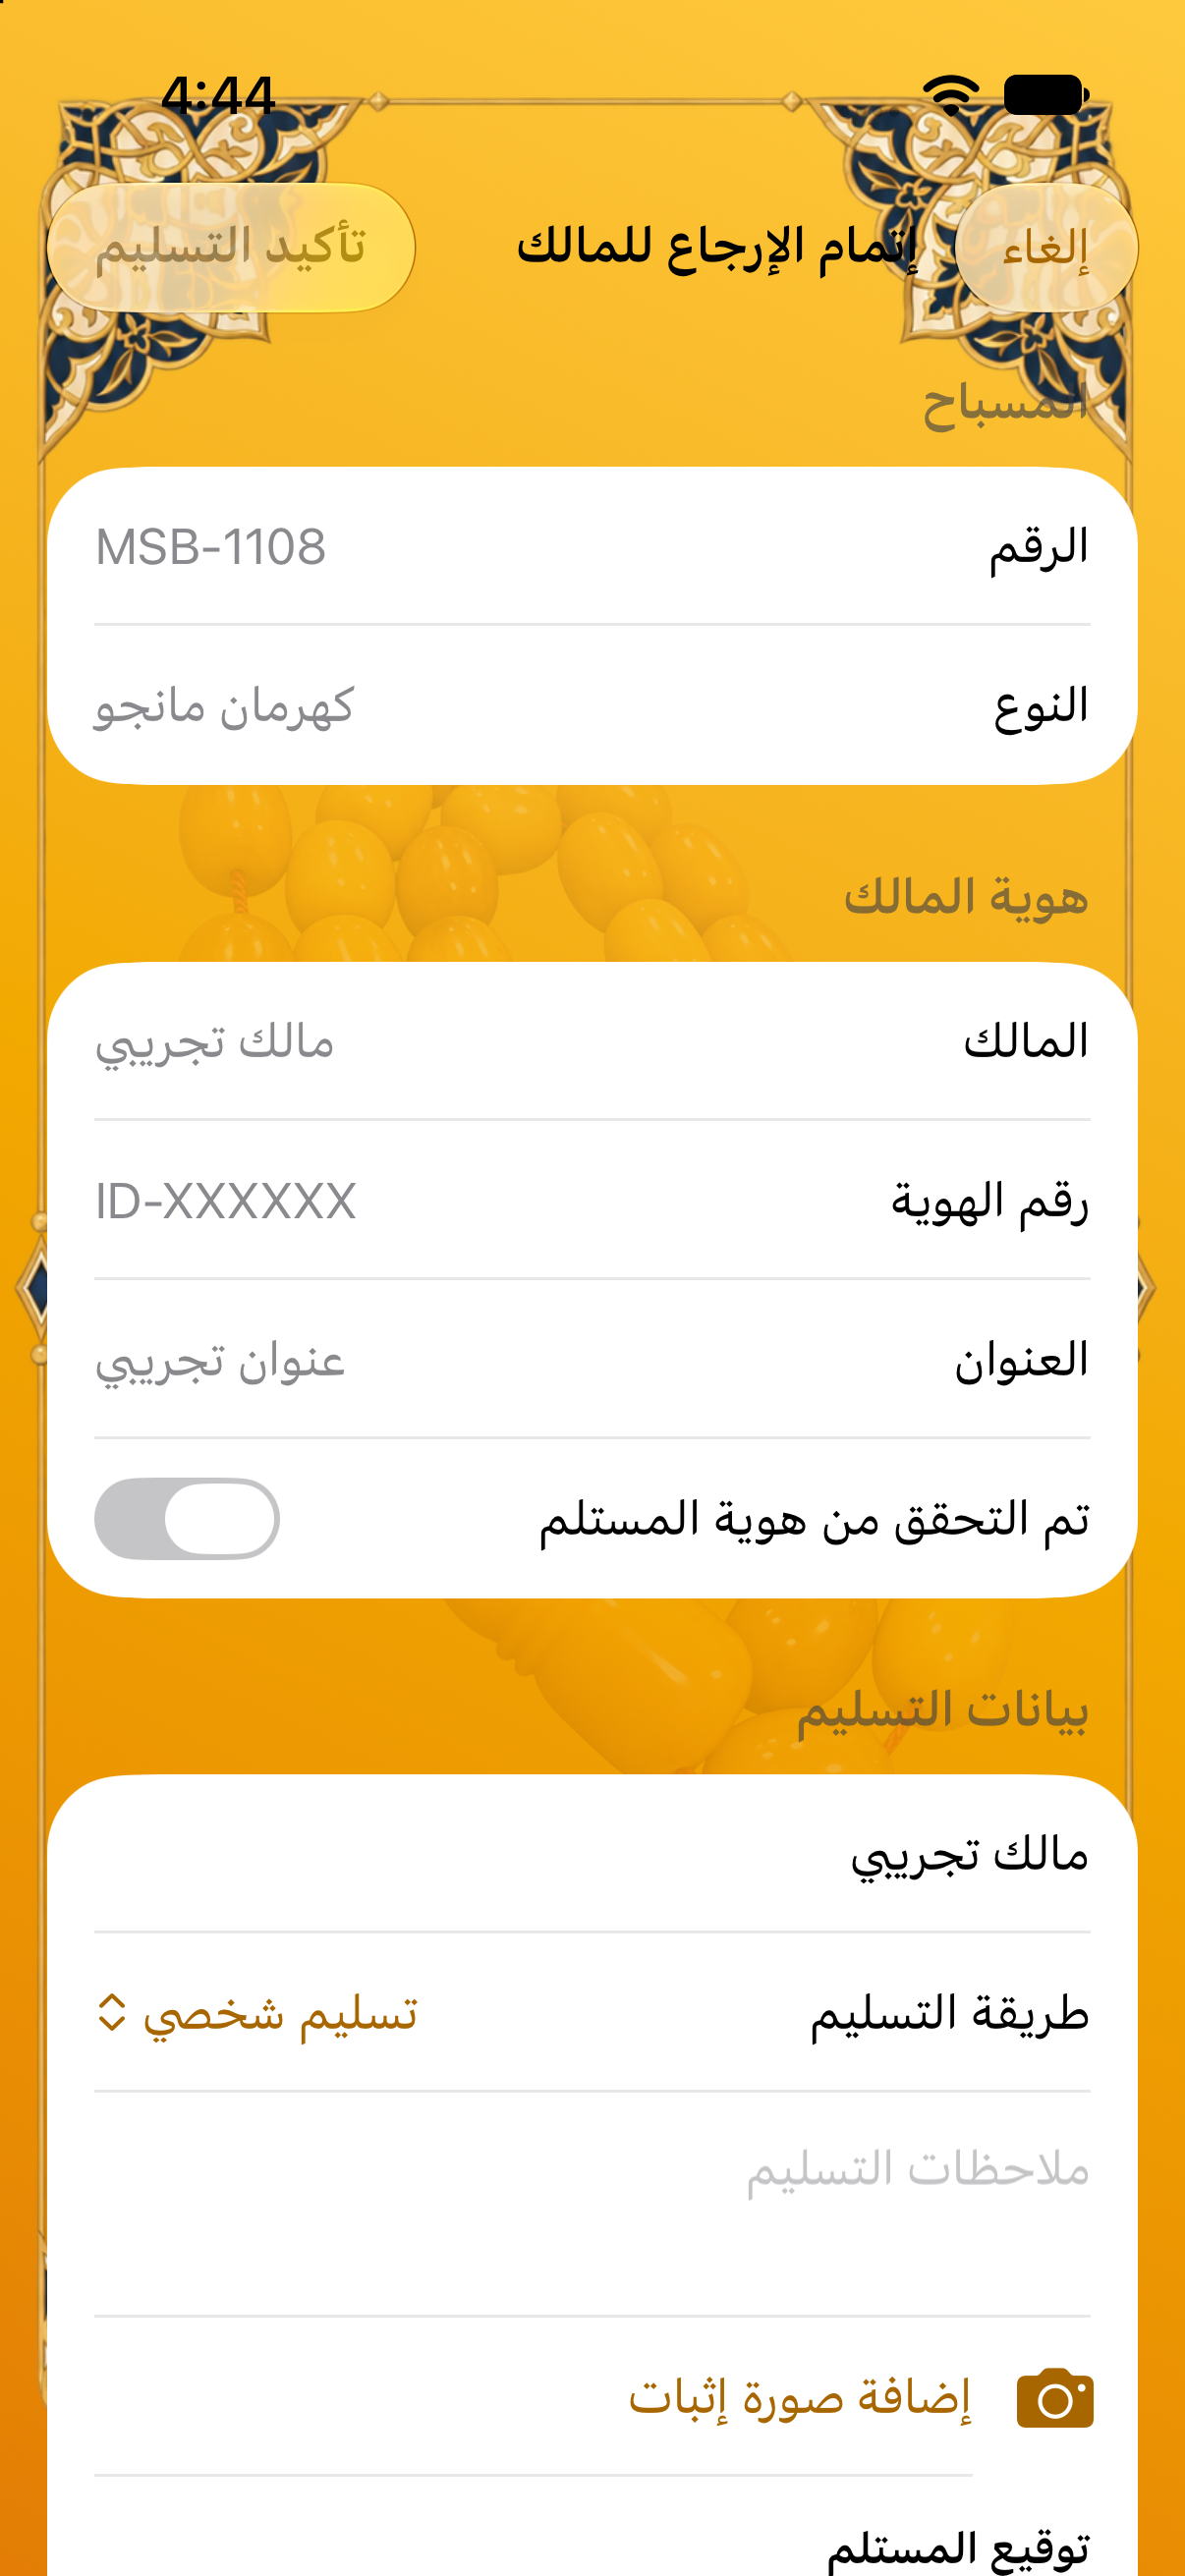
- يفتح المندوب شاشة تأكيد الاستلام ويسجل اسم المستلم وطريقة التسليم.
- يمكن إضافة صورة إثبات والتحقق من هوية المستلم.
- عند التأكيد تبدأ مدة الإرجاع المحددة في الإعدادات، ويصدر سند التسليم.
Payment, delivery and return window
- Record payment to move the item to Awaiting Delivery.
- The courier opens Confirm Receipt and records the recipient and delivery method.
- A proof image and recipient identity verification can be added.
- Confirmation starts the configured return window and generates a delivery note.
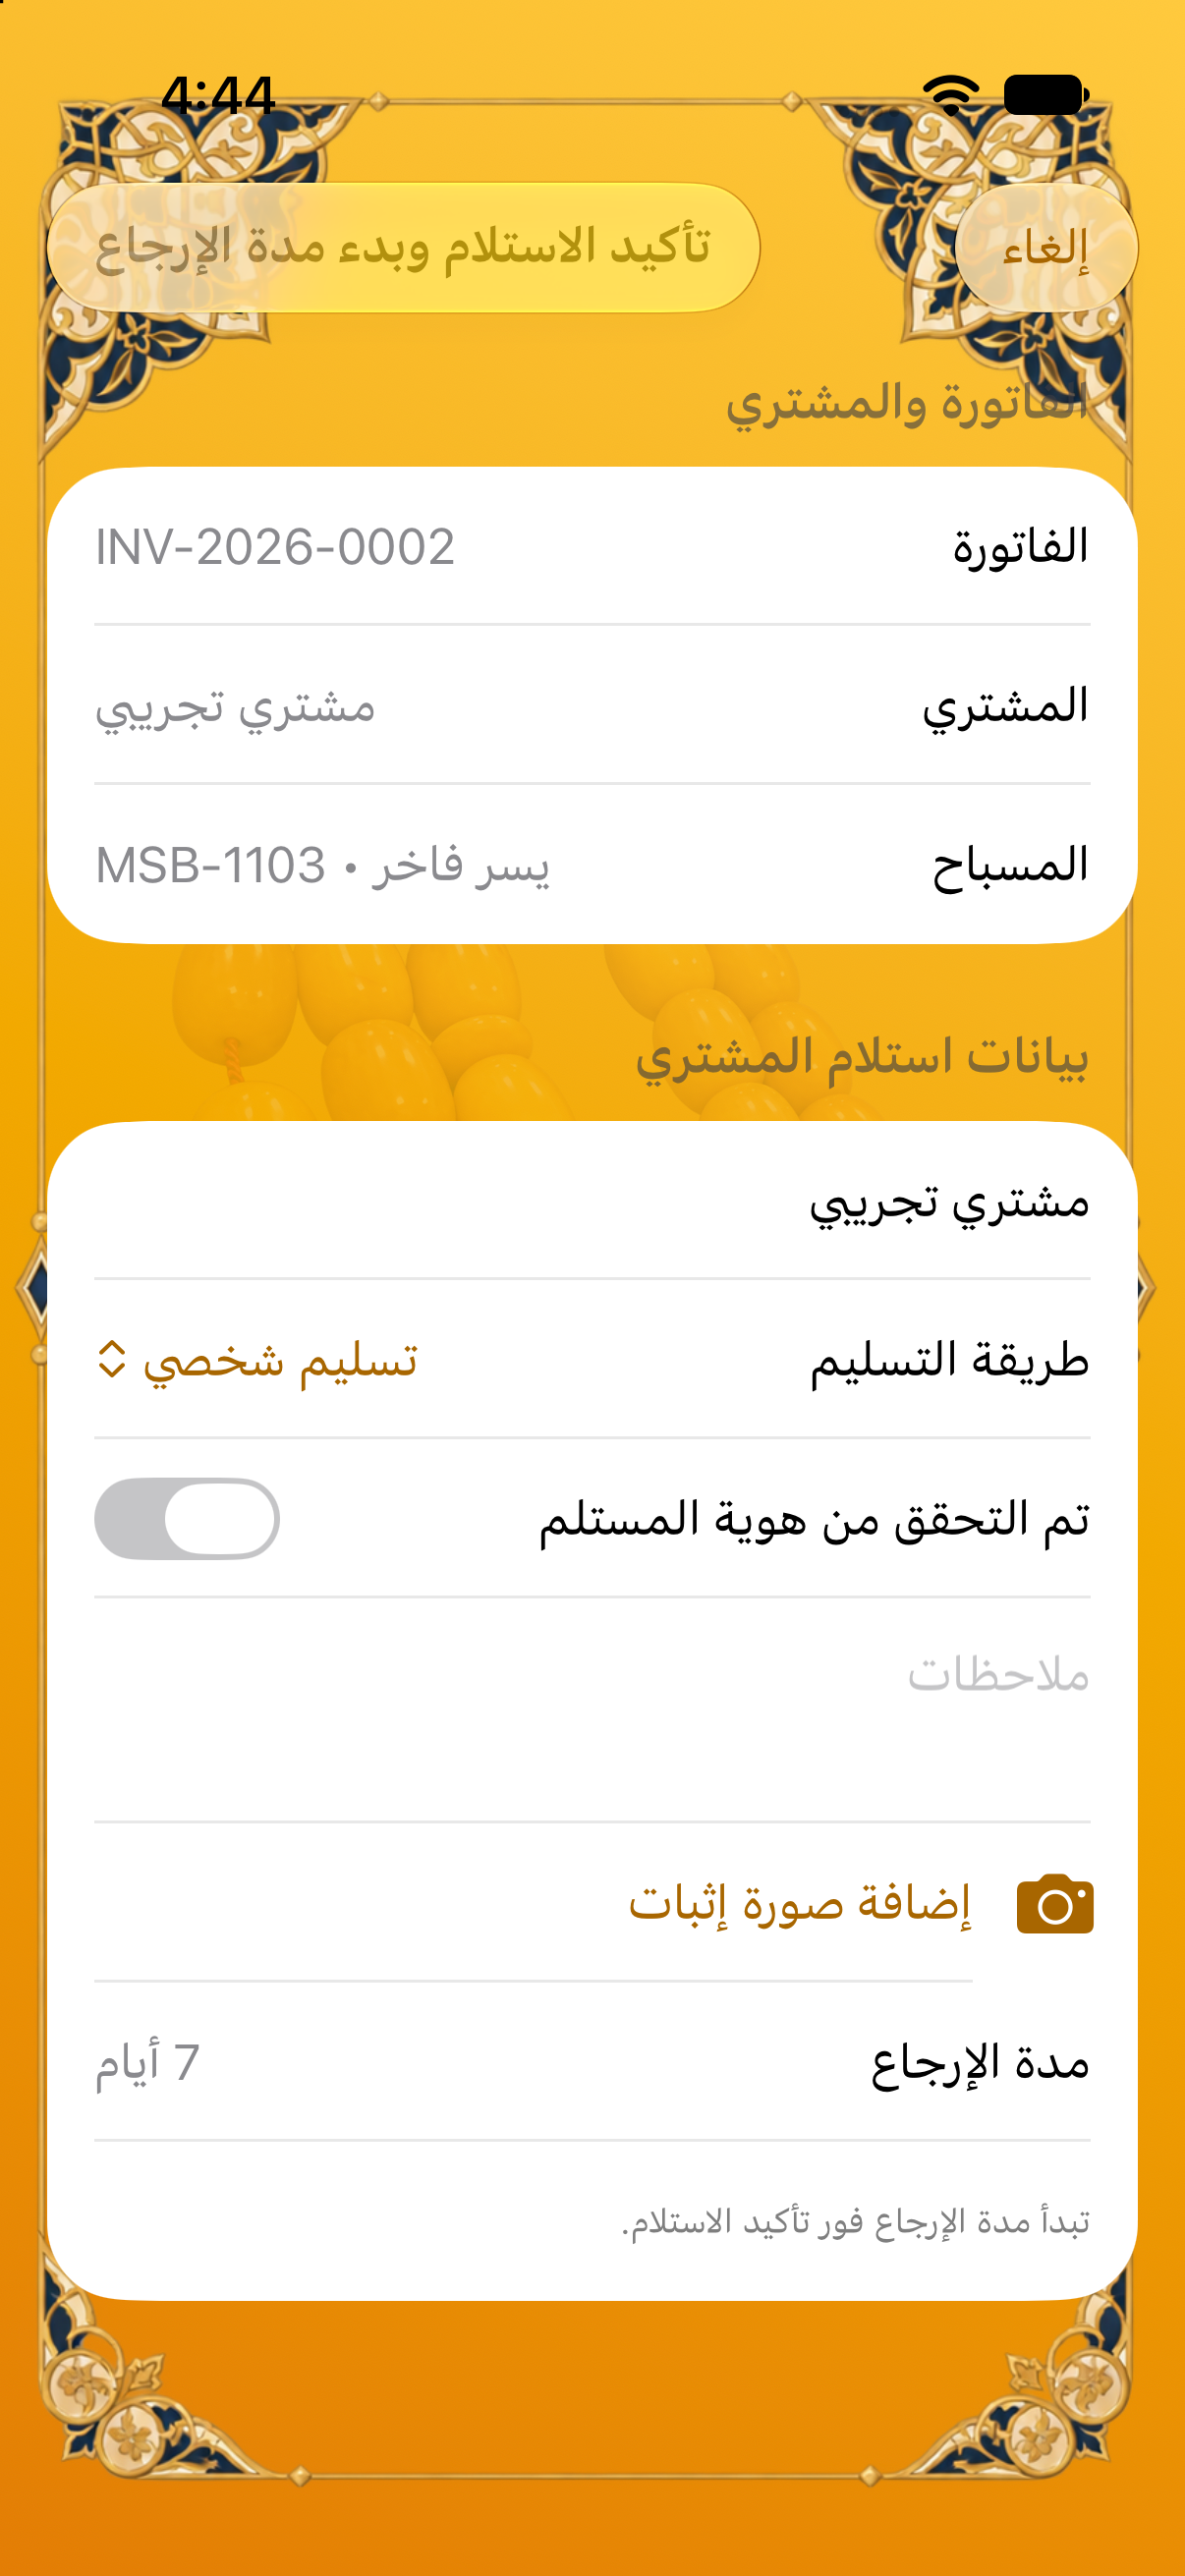
معالجة الإرجاع
- خلال المدة المسموحة افتح العملية من «مدة الإرجاع» واختر تسجيل مرتجع.
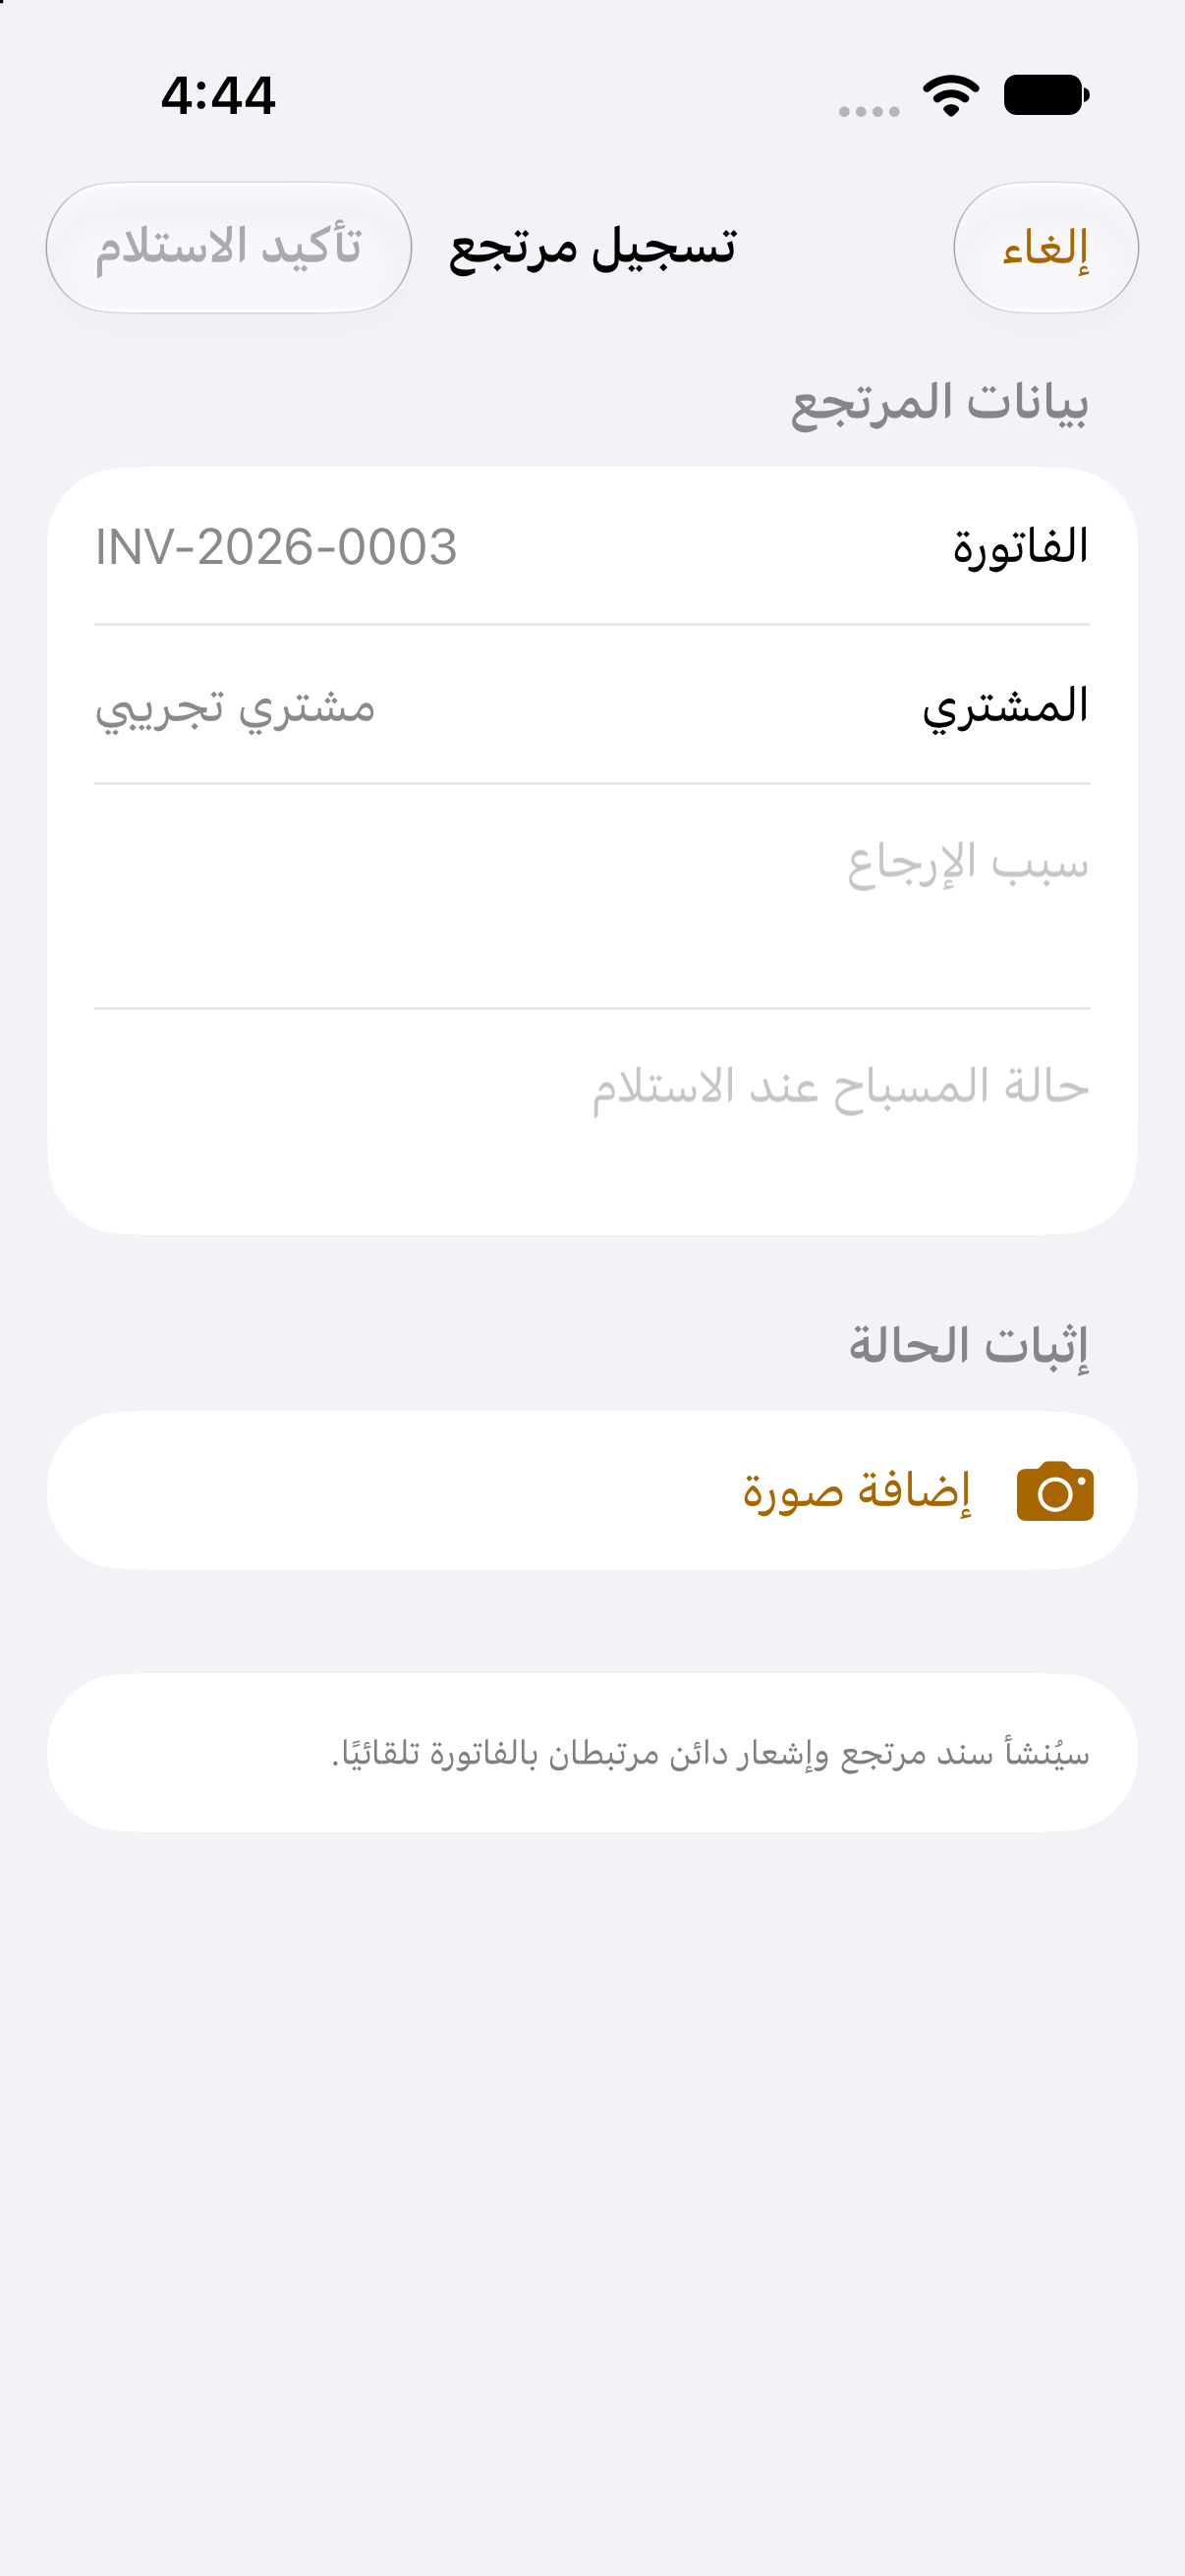
- سجّل سبب الإرجاع وحالة المسباح وأضف صورة إثبات.
- ينشئ البرنامج سند مرتجع وإشعارًا دائنًا ومستند رد المبلغ.
- قرر إعادة المسباح إلى مزاد قادم أو تسليمه للمالك.
- عند تسليمه للمالك سجّل حالة المسباح وأكد الاستلام، ثم تُؤرشف الدورة كاملة.
Process a return
- During the allowed period, open the transaction from Return Window and register a return.
- Record the reason, item condition and an evidence image.
- The app creates a return note, credit note and refund payment record.
- Choose whether to return the item to a future auction or to its owner.
- For an owner return, record the condition and confirm handover, then archive the complete workflow.
إدارة المستندات والأرشيف
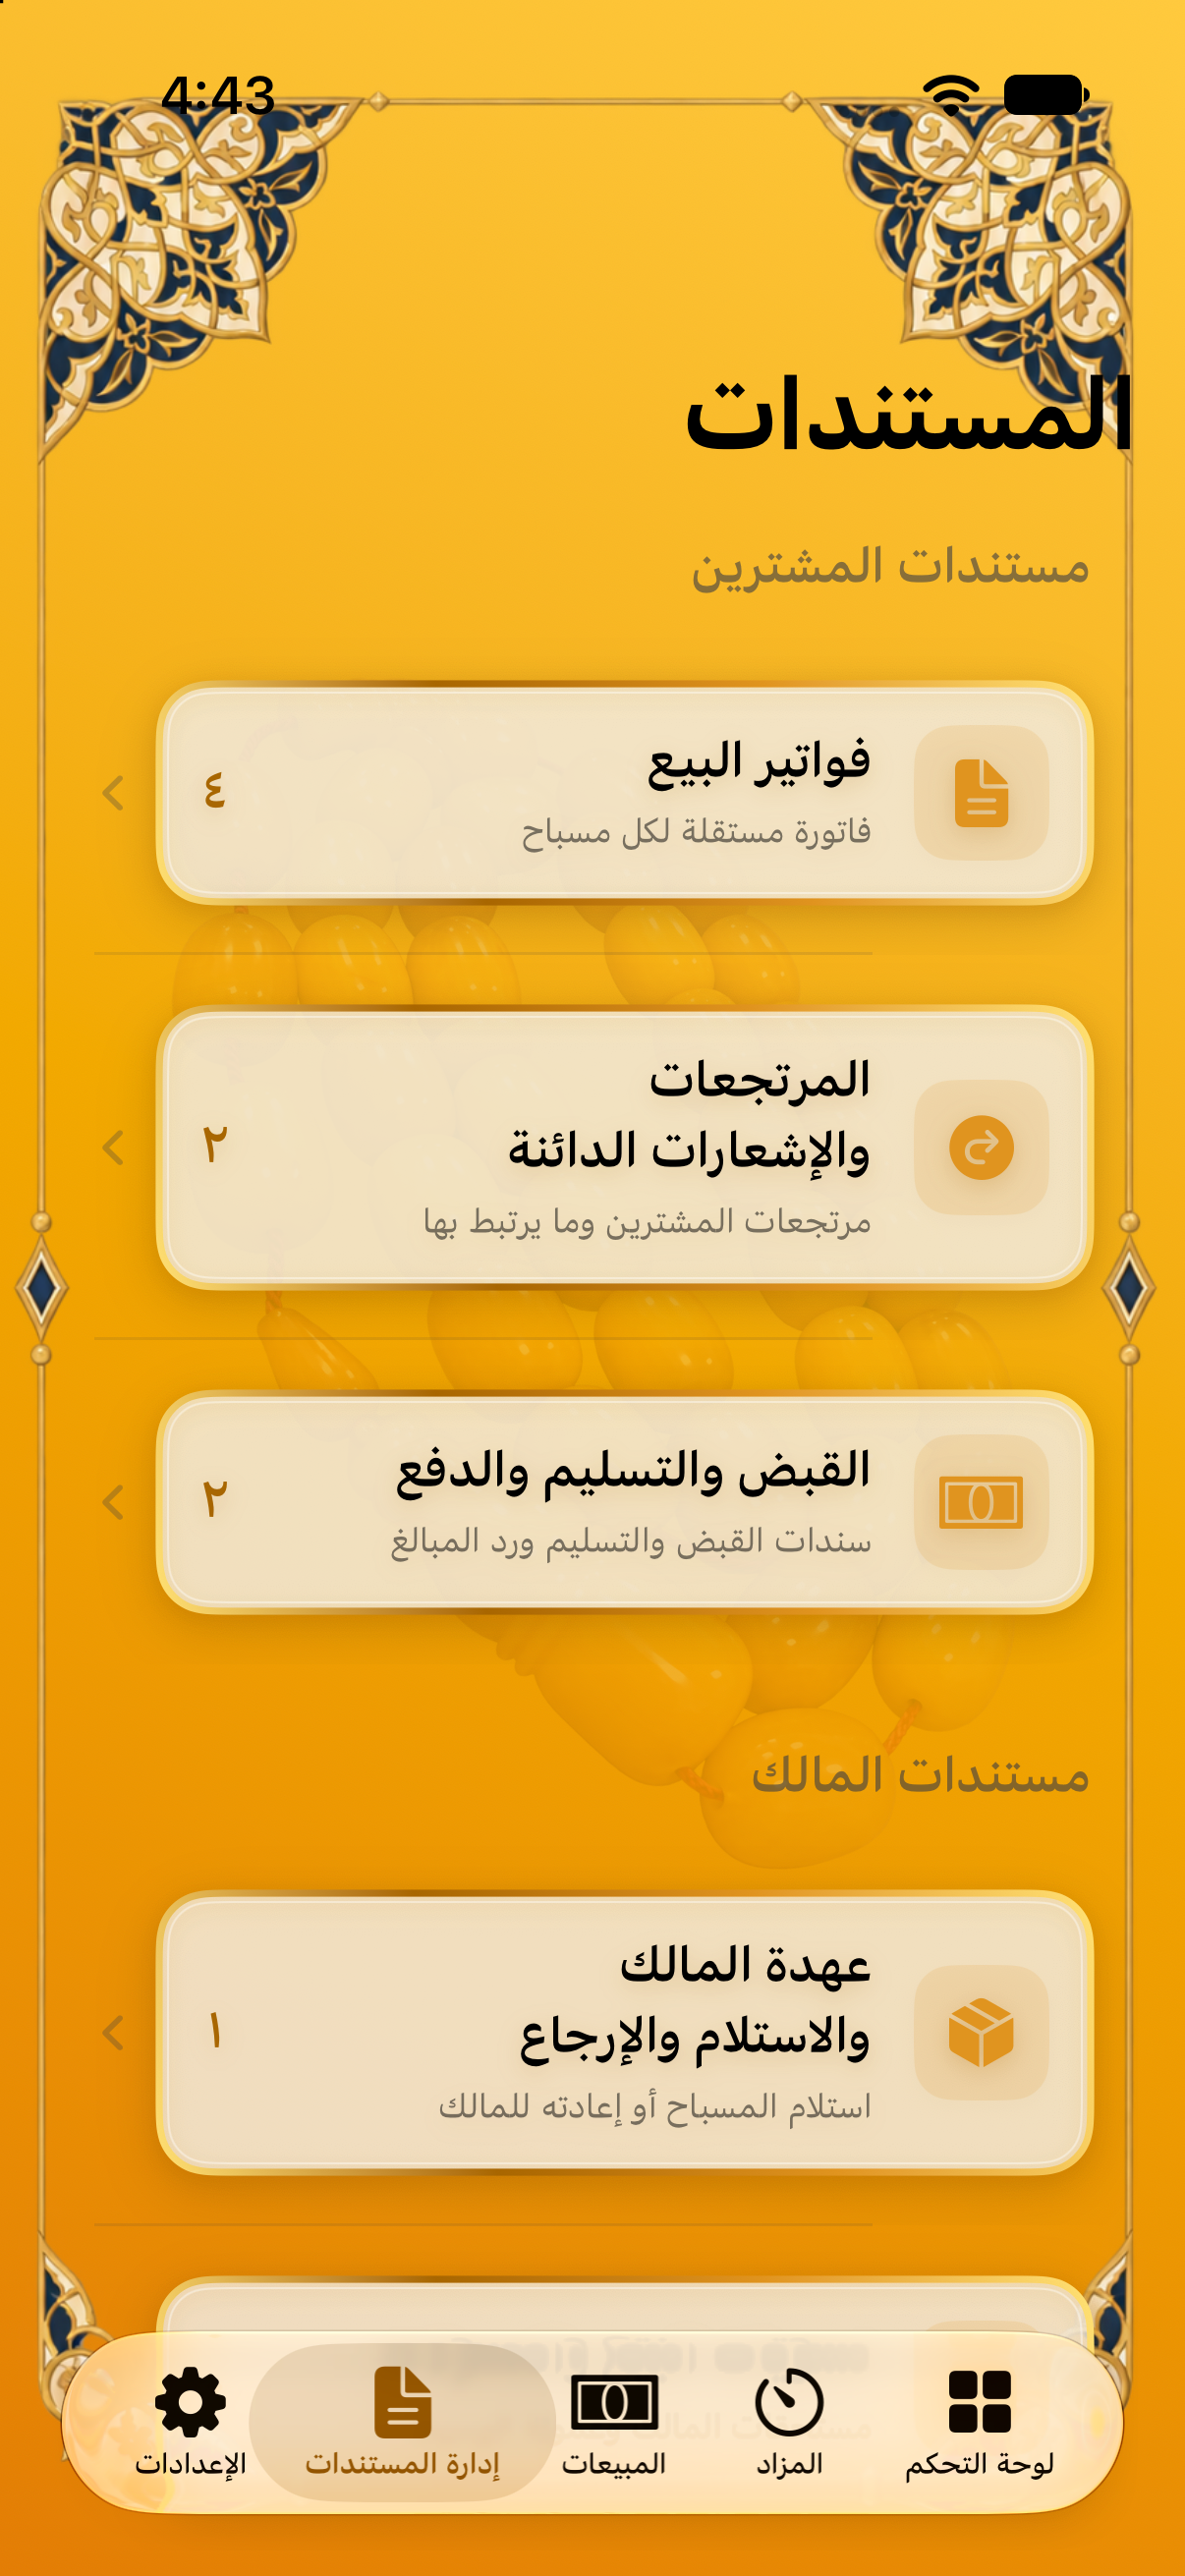
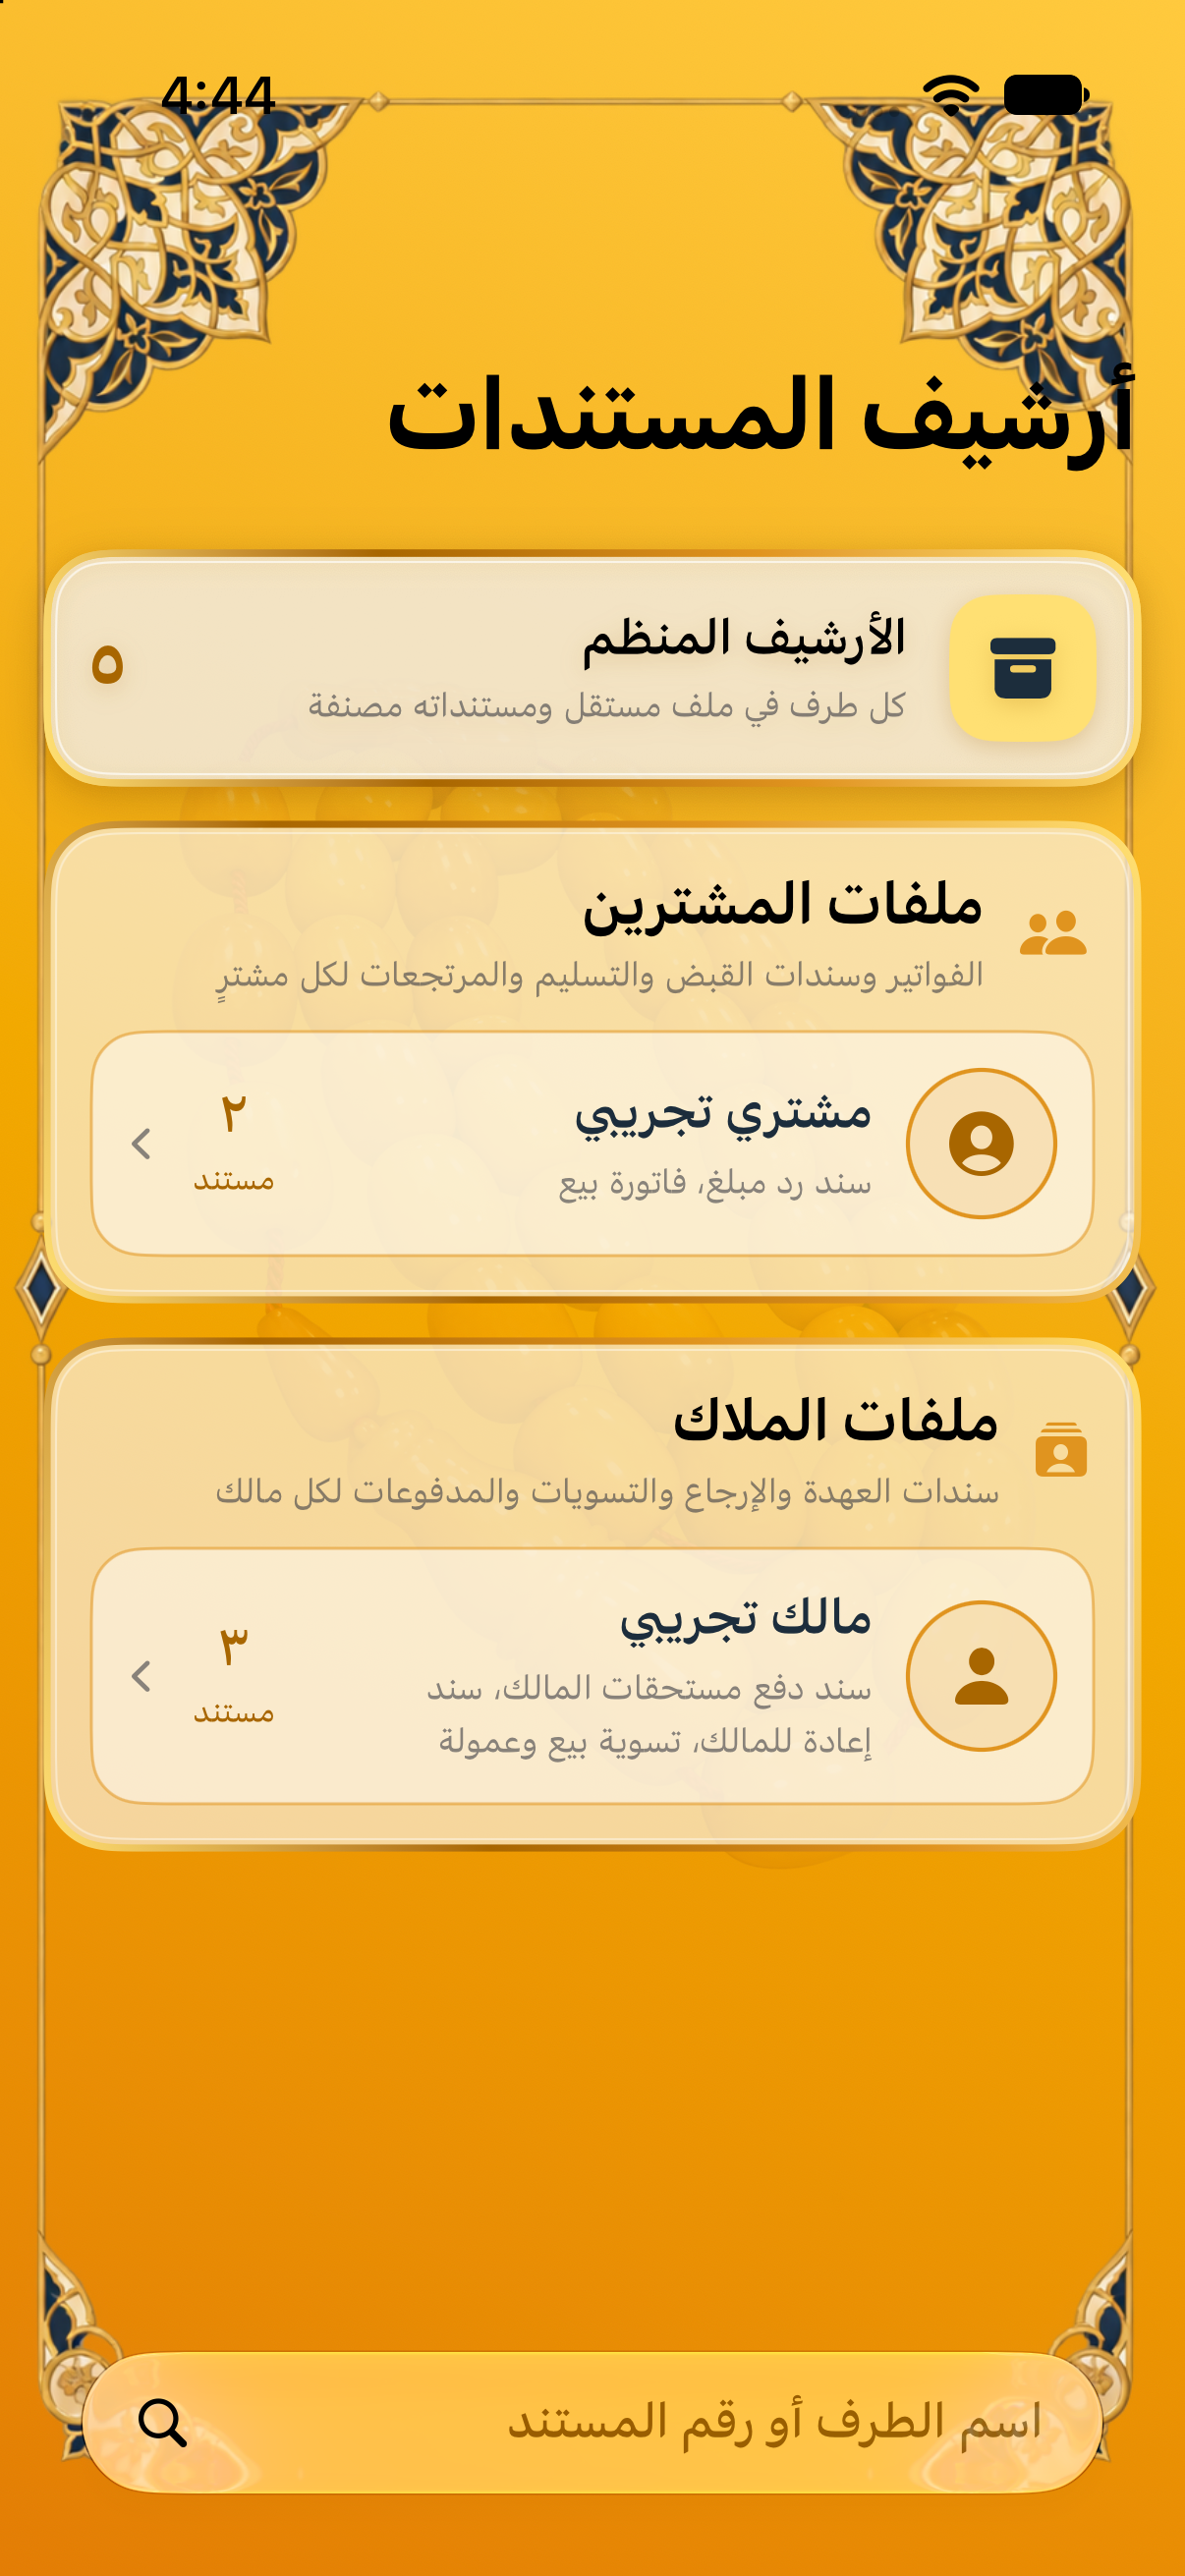
تُجمع المستندات حسب نوعها ثم حسب المشتري أو المالك، ويحتفظ كل ملف بجميع المستندات المرتبطة به.
- فواتير البيع.
- المرتجعات والإشعارات الدائنة.
- سندات القبض والتسليم ورد المبالغ.
- سندات عهدة المالك والإرجاع.
- تسويات المالك وعمولة الوسيط.
بعد اكتمال الدورة تنتقل المستندات إلى الأرشيف، ولا تظهر في قوائم العمل النشطة.
Document management and archive
Documents are grouped by type and then by buyer or owner. Each party file retains all connected records.
- Sales invoices.
- Returns and credit notes.
- Payment receipts, delivery notes and refunds.
- Owner custody and return documents.
- Owner settlements and auctioneer commission.
Once the workflow is complete, documents move to the archive and disappear from active work lists.
الإعدادات والبيانات الأساسية
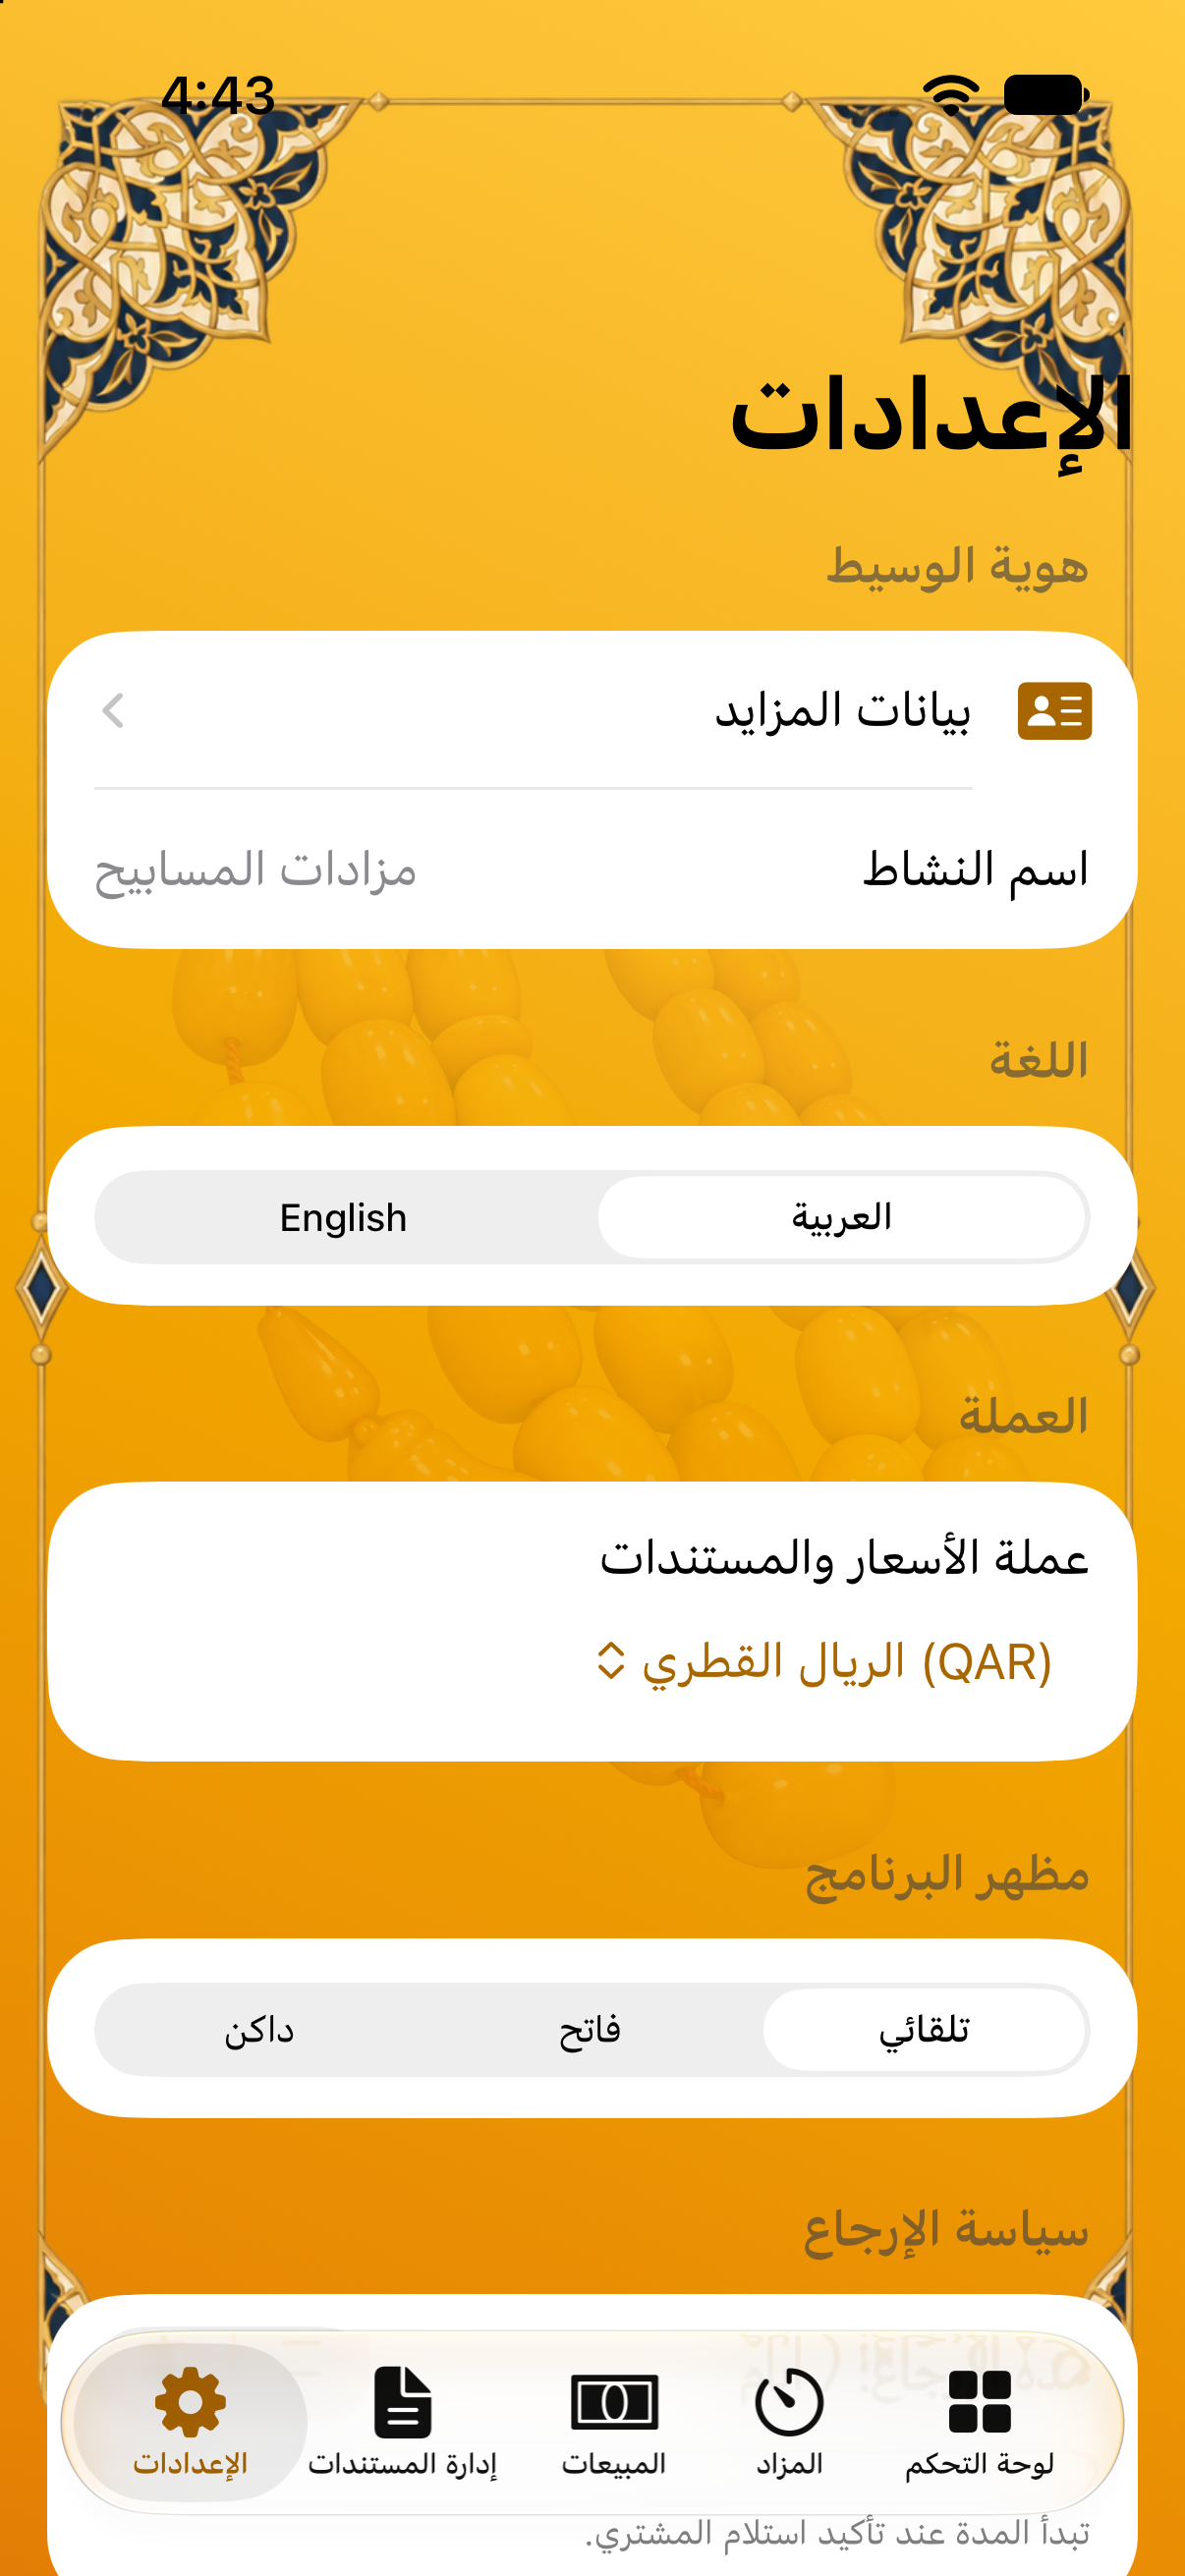
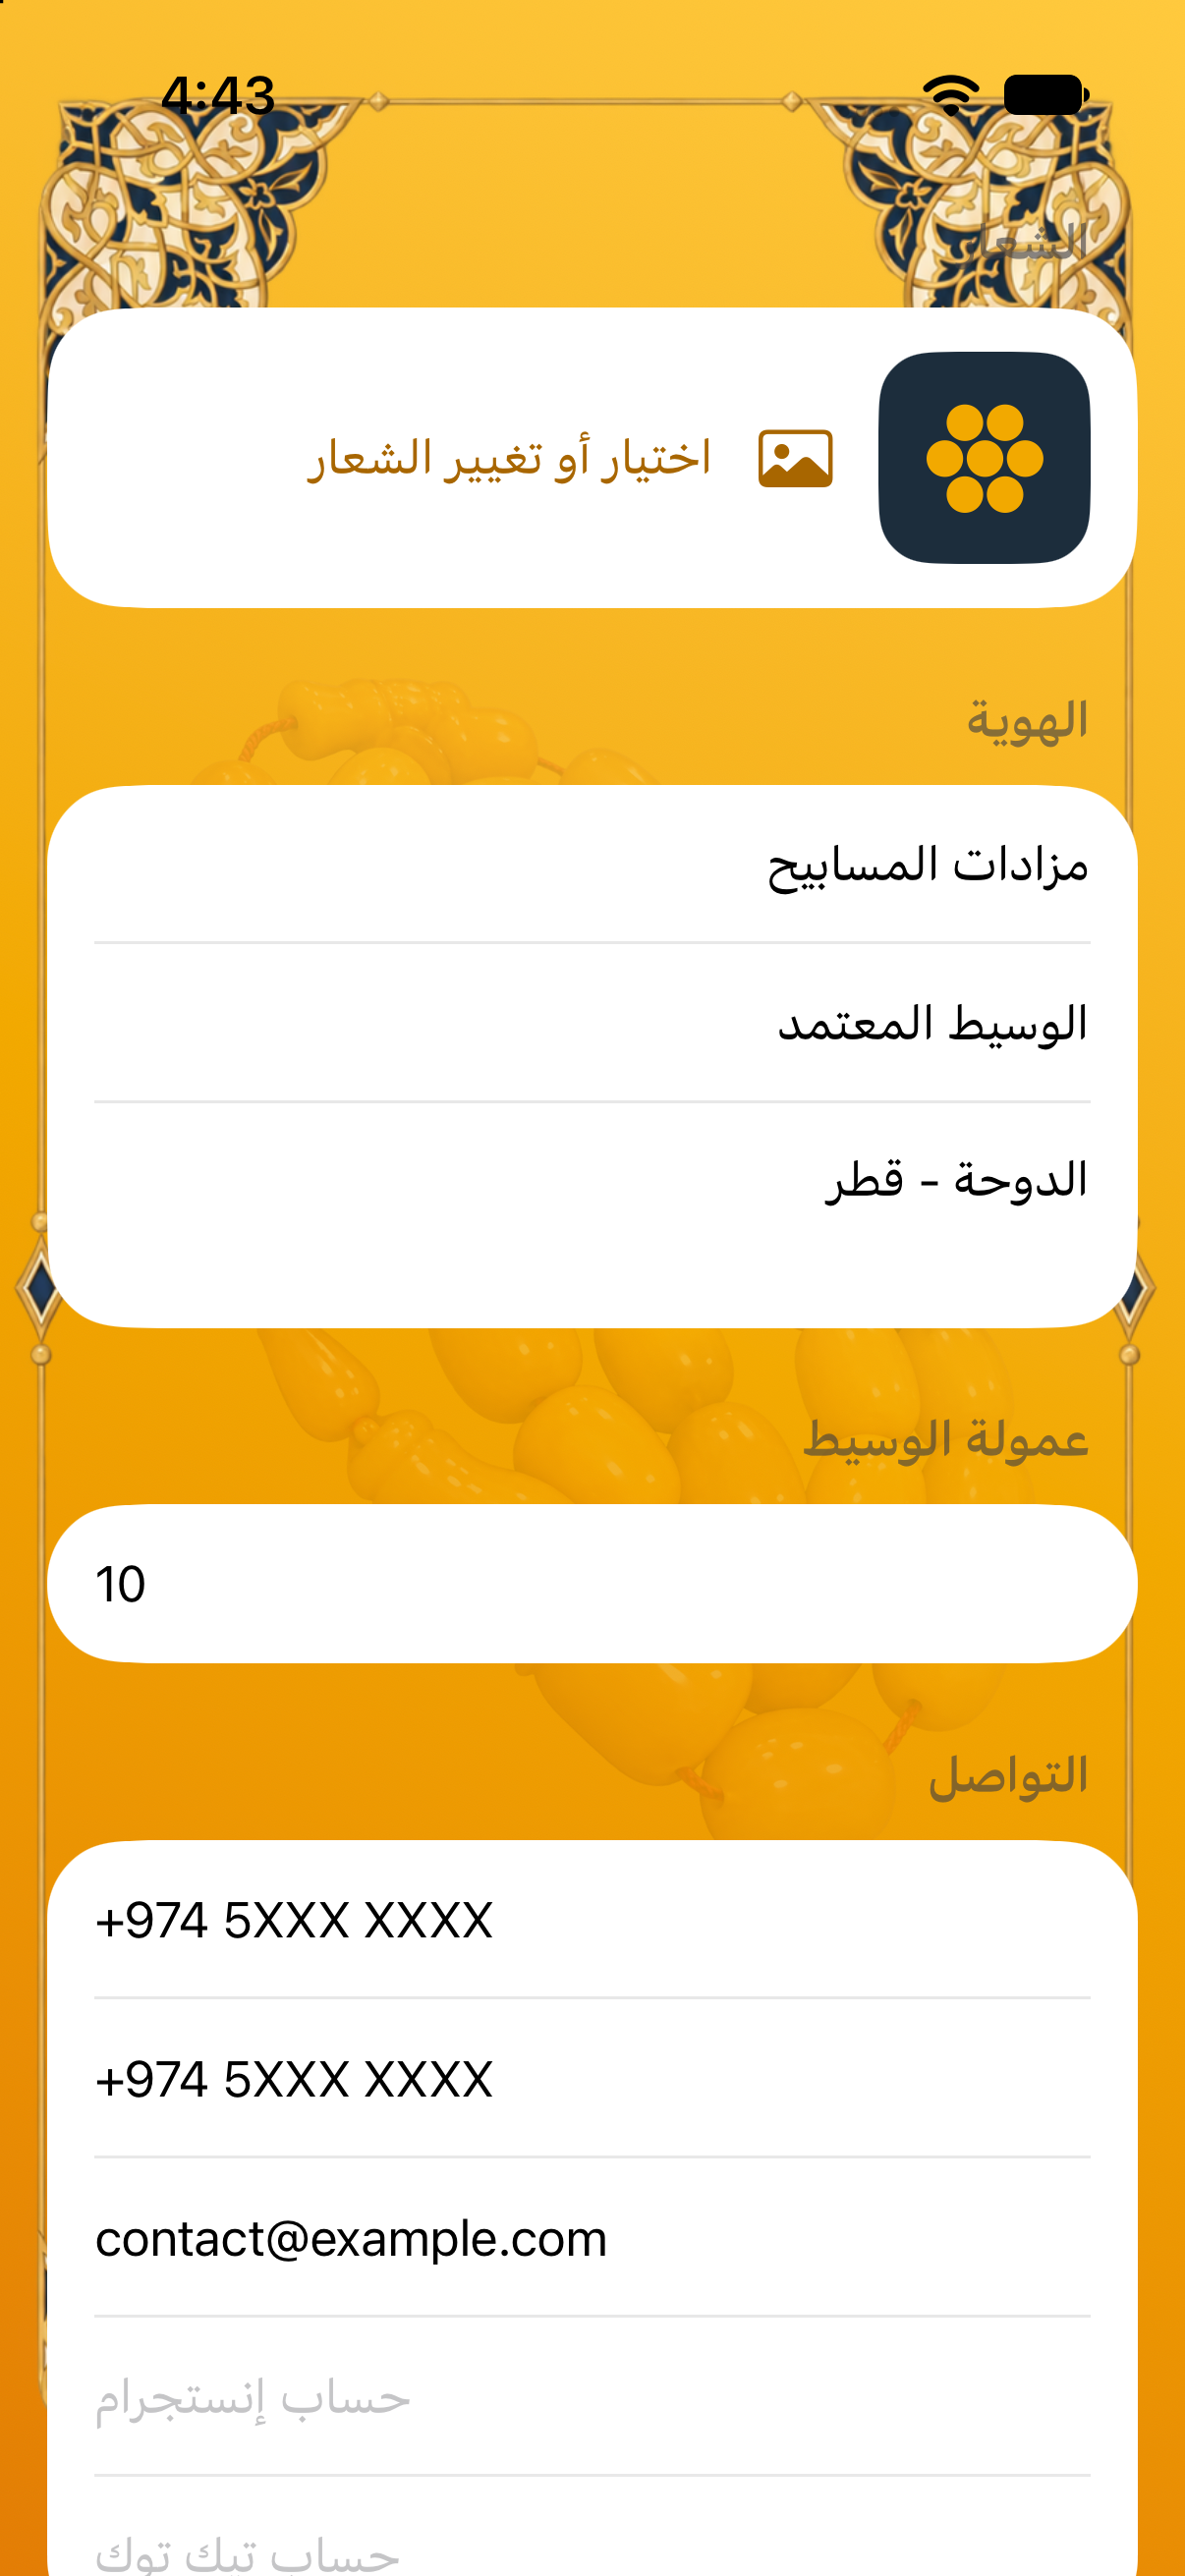
راجع الإعدادات قبل بدء العمل، خصوصًا بيانات الوسيط، نسبة العمولة، مدة الإرجاع، اللغة، المظهر، واتصال Apple TV. تُستخدم هذه البيانات في الواجهات والمستندات.
لا تستخدم صور الهوية أو معلومات الاتصال الحقيقية في مواد التدريب أو الصور المنشورة على الموقع.
Settings and business details
Review Settings before operation, especially auctioneer details, commission rate, return period, language, appearance and Apple TV connection. These values are used throughout the interface and documents.
Do not use real identity images or contact information in training material or public website images.